This is also valid for Ubuntu and other Ubuntu-based distributions.
Anbox is a discontinued free and open-source compatibility layer that aims to allow mobile applications and mobile games developed for Android to run on Linux distributions.
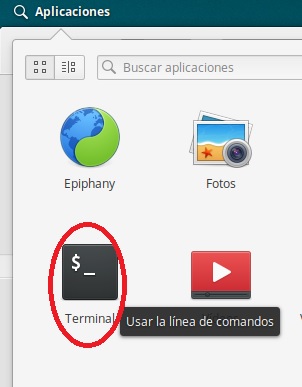
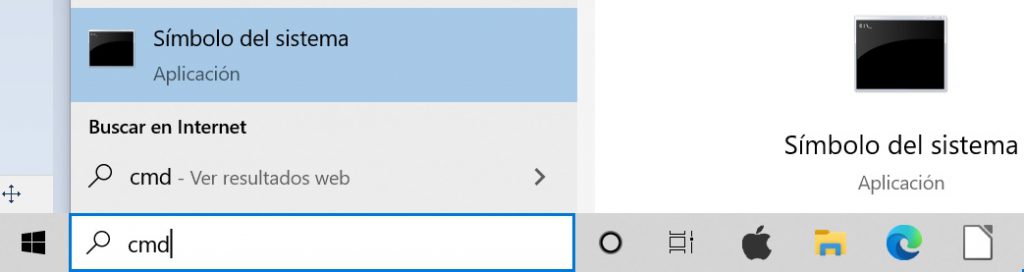
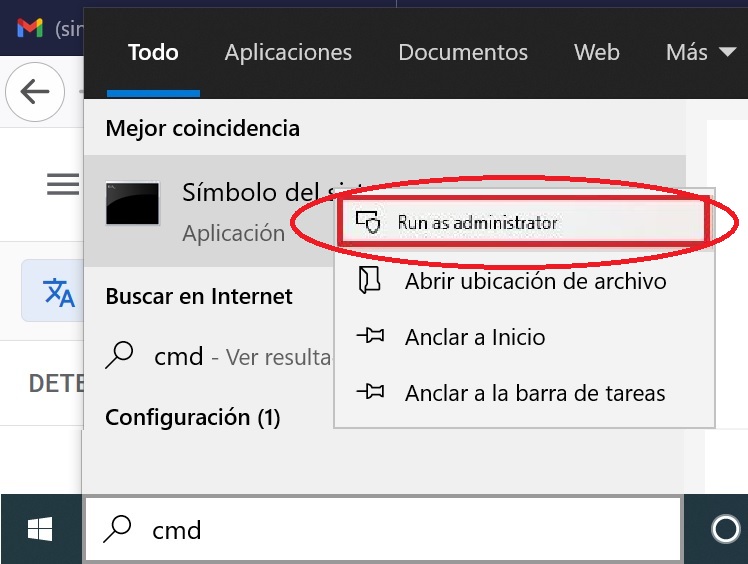
To install Anbox we open a terminal from Applications
From the terminal we write:
sudo apt update
And then we need to install snapd
sudo apt install snapd
We can check the version of snapd that has been installed
snap –version
We are ready to install the beta version of Anbox
sudo snap install –devmode –beta anbox
And now we only have to install android-tools-adb
sudo apt install android-tools-adb
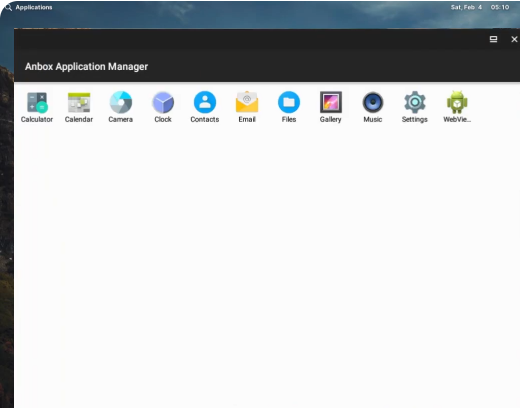
It is time to restart the device to be able to access Android Application Manager from the applications menu.
Now we can download applications for Android and install them in Anbox, to do this we open a terminal again and write the application installation command
adb install My_apk.apk
that once installed will also appear within the Android Application Manager
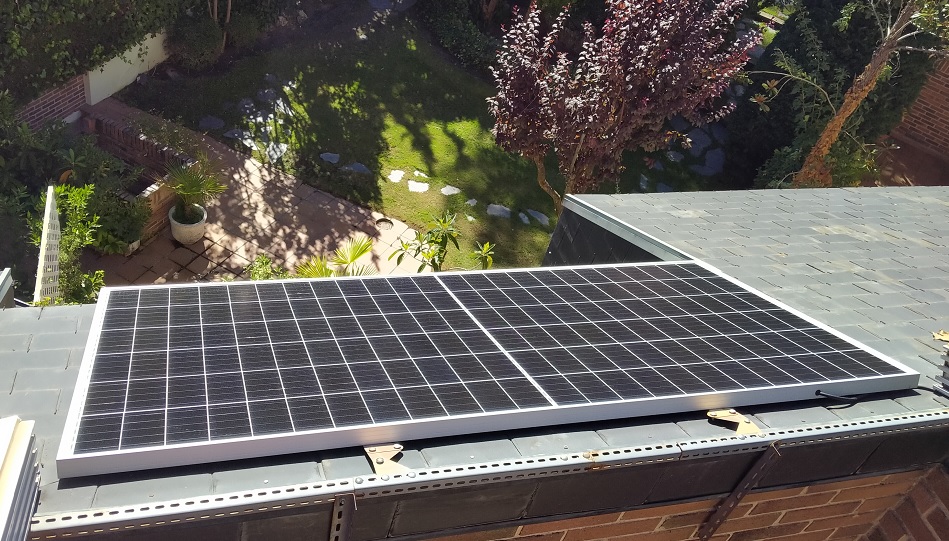
Many of us have installed a solar panel connecting it through a microinverter to a plug in our home electrical network.
In an on-grid solar system, the photovoltaic panels are connected to the utility grid. During the day, the solar modules supply your home with electricity.
Actually this is an on-grid photovoltaic installation.
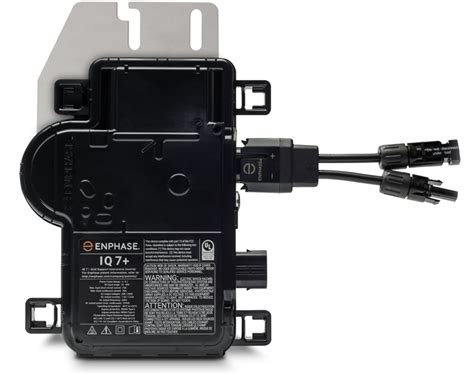
For this I used a microcrystalline solar panel and connected it to an Enphase IQ7 Microinverter.
The microinverter transforms direct current into alternating current
The problem was that after doing the installation I didn’t know how much electricity it provided , I didn’t even know if it works . I tried to buy the specific measurement system to connect to the Enphase IQ7 microinverter, but it was very expensive. So I installed a smart plug between the microinverter and the domestic plug to try to measure the current passing through it.
And it was effectively able to measure the electric current passing through it.
Energeeks 3.0 app
I could also connect the smart plug through WiFi to an application on my mobile phone (Energeeks 3.0) where I can see the electrical production at the moment and all the statistics of energy production.
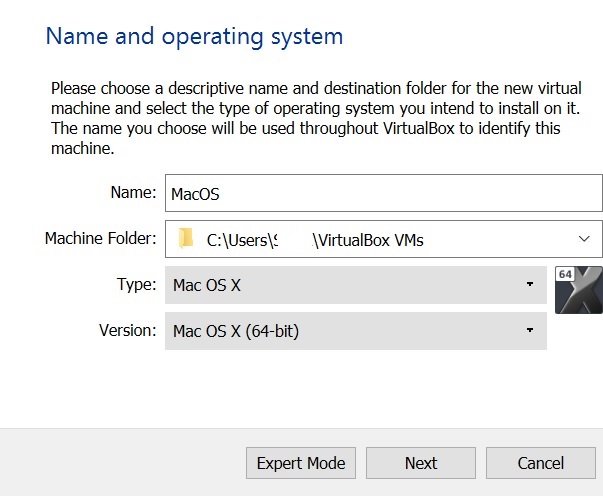
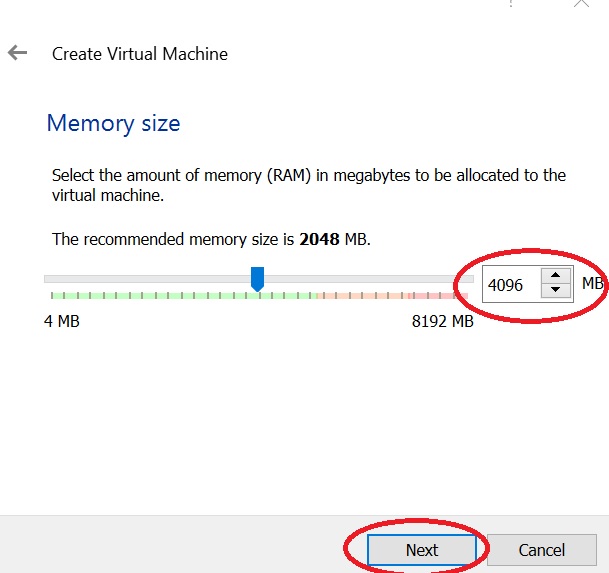
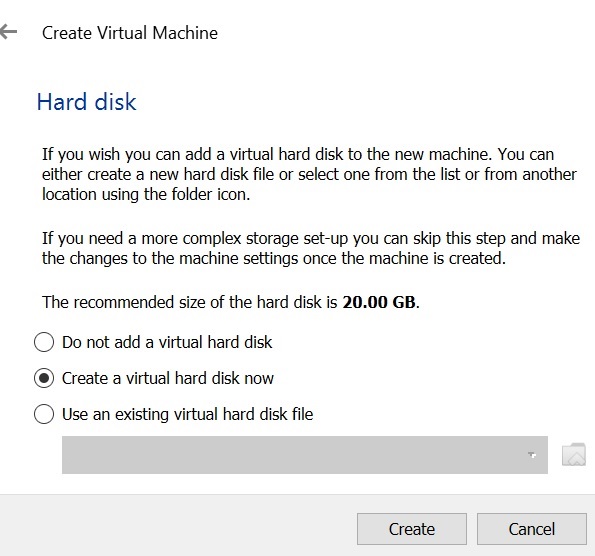
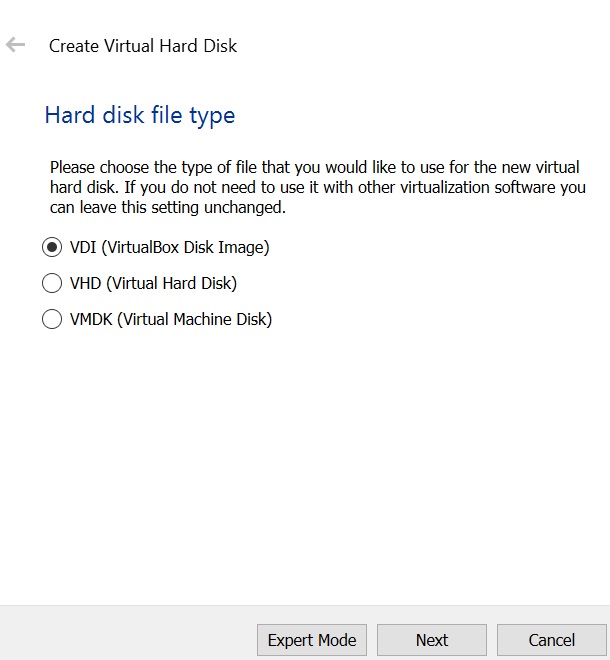
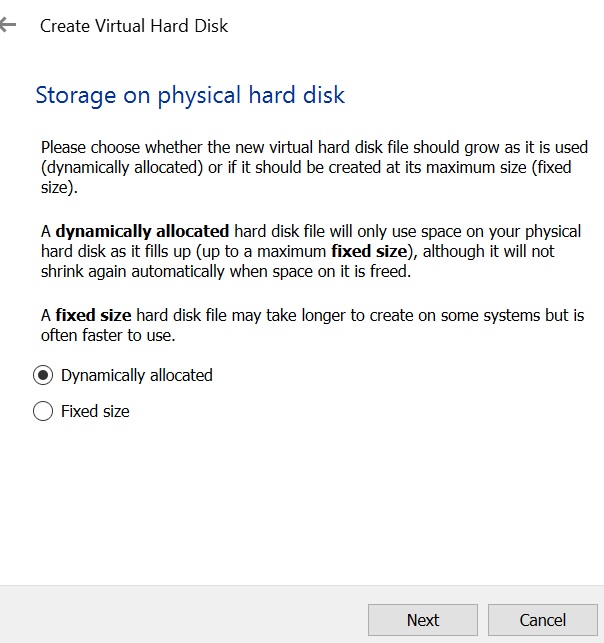
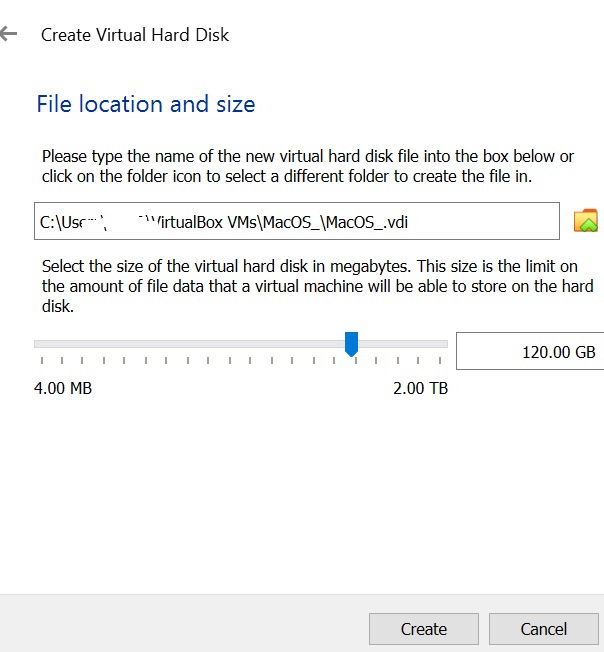
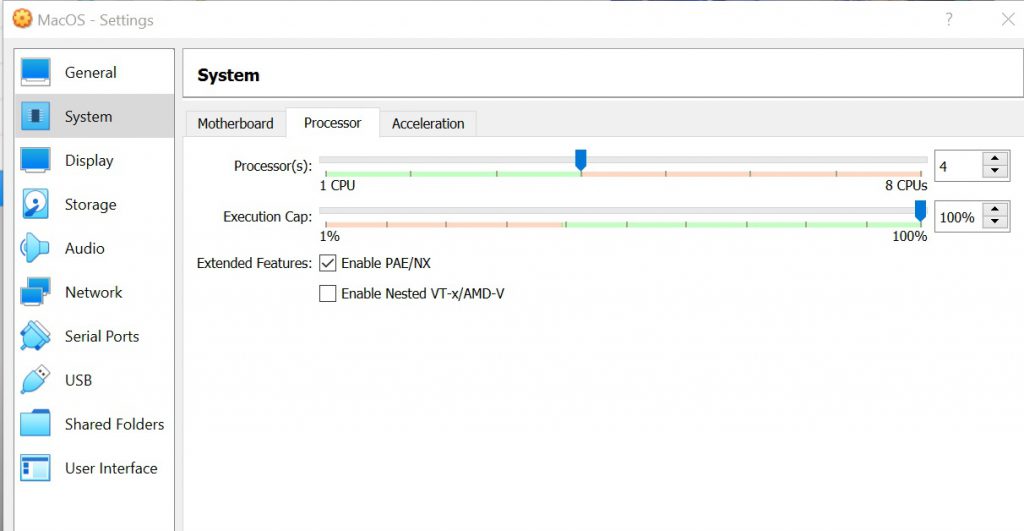
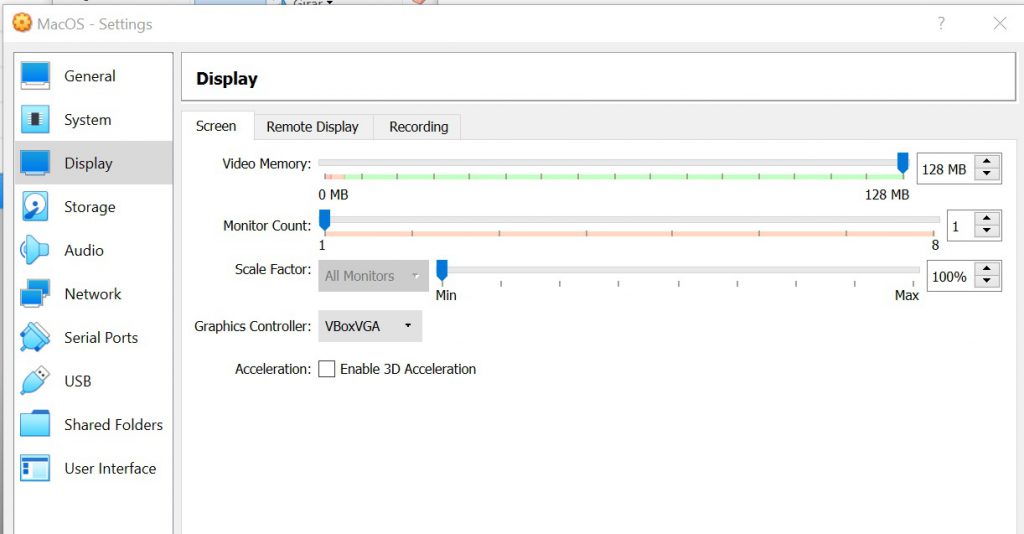
In order to be able to use Windows and Mac OS simultaneously on a Windows tablet, we have installed a Mac OS virtual machine using VirtualBox on a Chuwi Ubook tablet.
Chuwi Ubook tablets come with the 64-bit Intel Celeron Gemini-Lake N4120 processor, with 8GB of RAM and 256GB of SSD. They bring Windows 10 pre-installed.
These features allow them to run simultaneously Windows 10 and MacOS with enough agility to work comfortably.
As we have said Windows 10 comes pre-installed, then we only have to install MacOS on a virtual machine inside of the tablet so that they can run simultaneously.
Make sure you have a license to use both operating systems.
To do this you can download the Mac OS from Apple’s website.
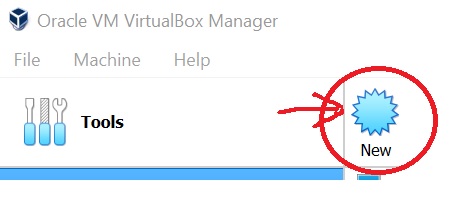
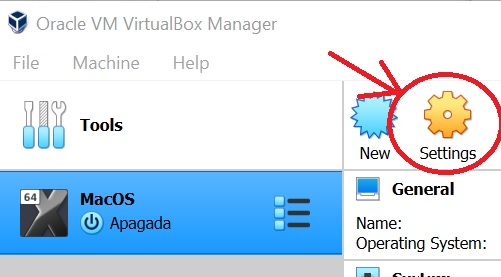
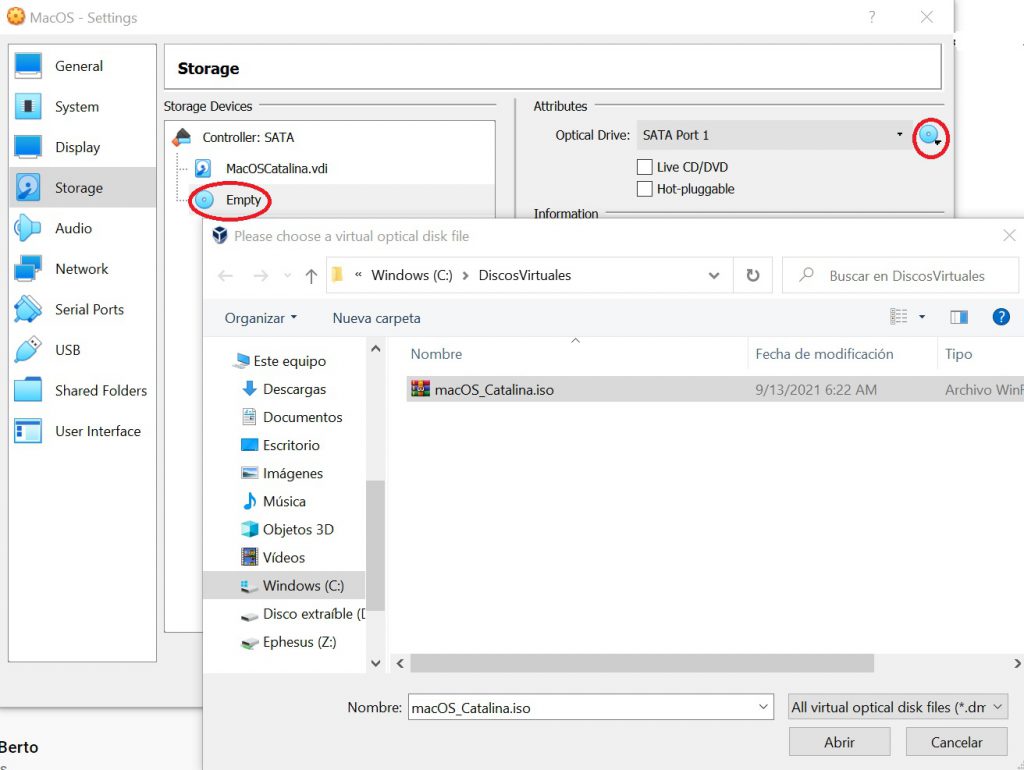
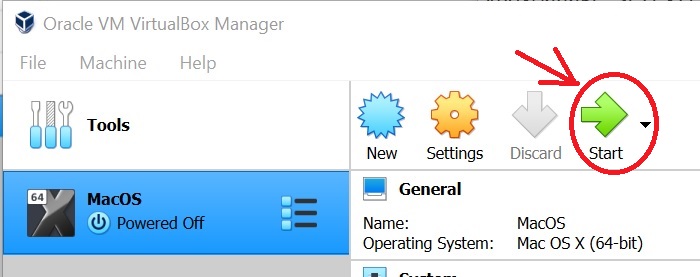
Now we open Virtual Box again and we run our new virtual machine
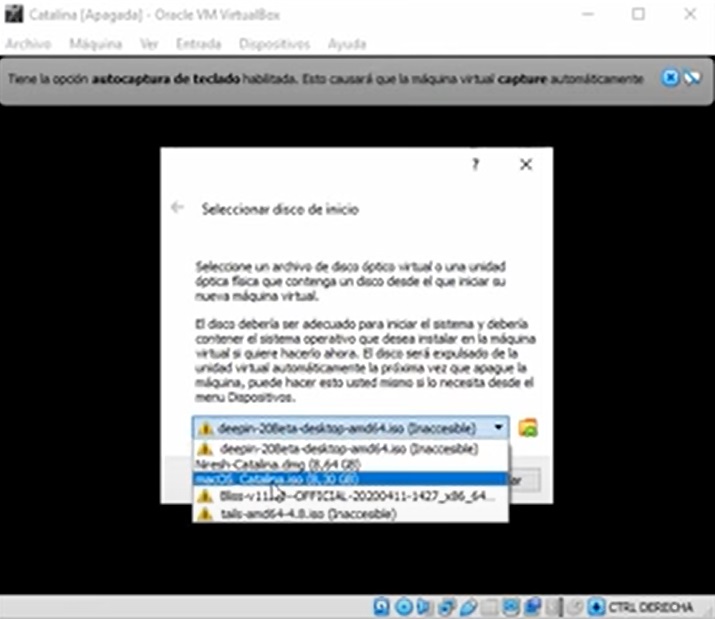
Now if the system asks for the ISO to run whe choose the iso we downloaded macOS_Catalina.iso
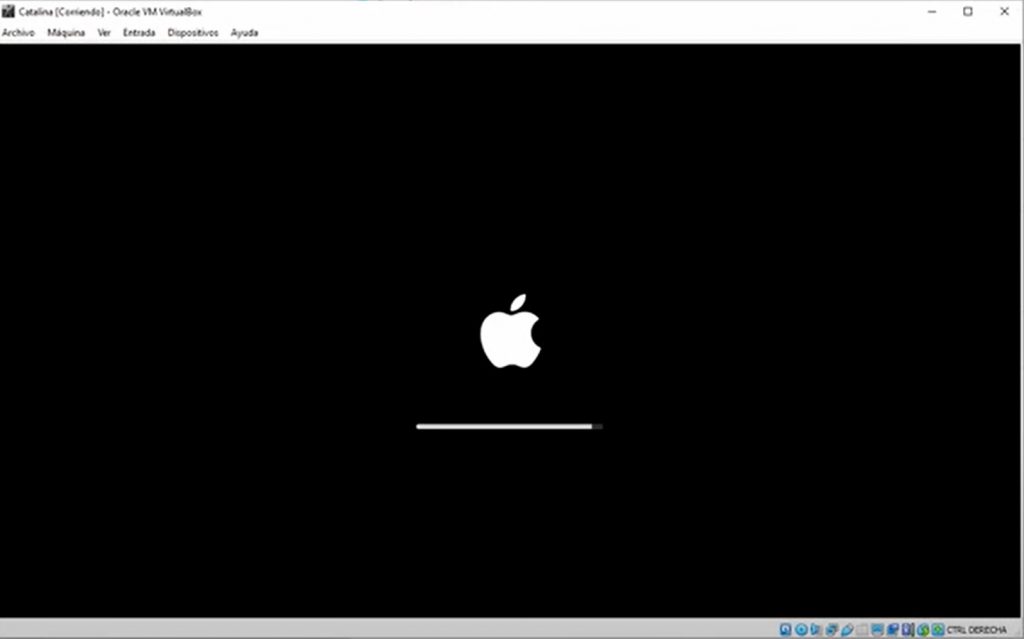
The system take it´s time to run an finally the apple shows up
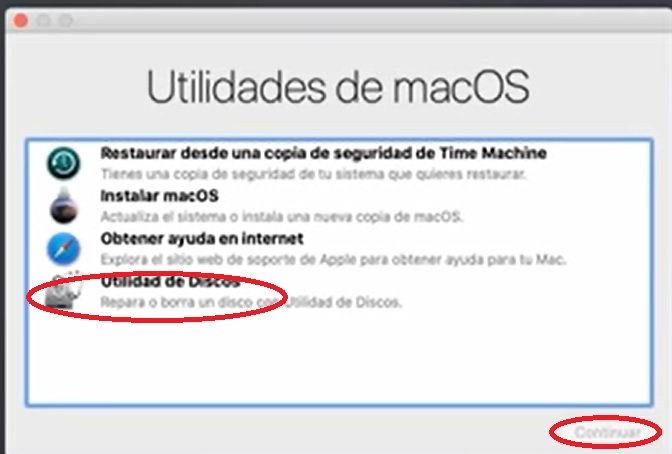
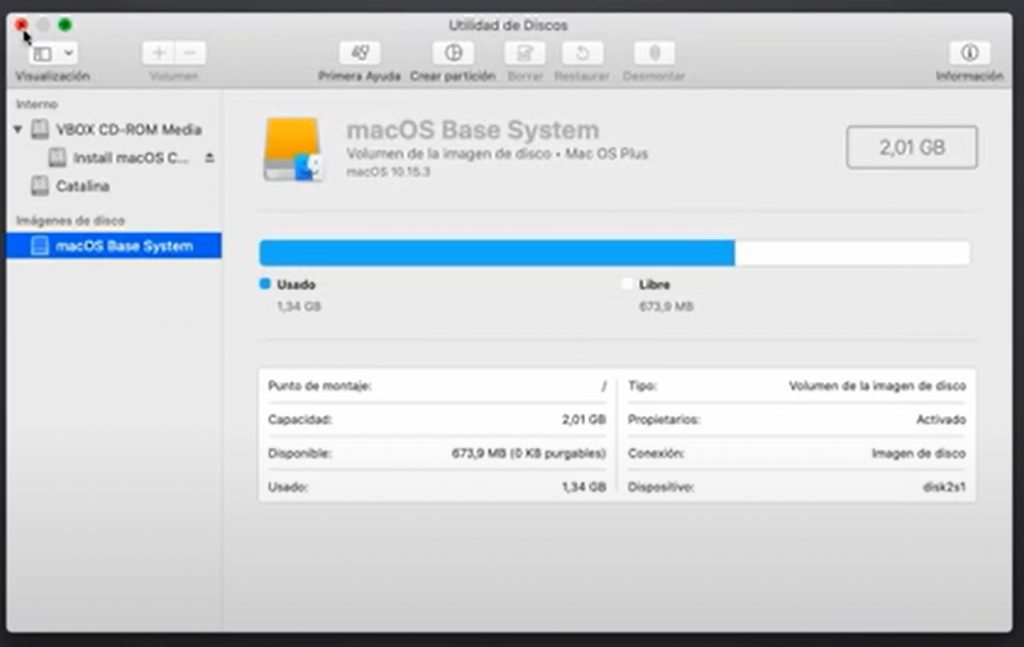
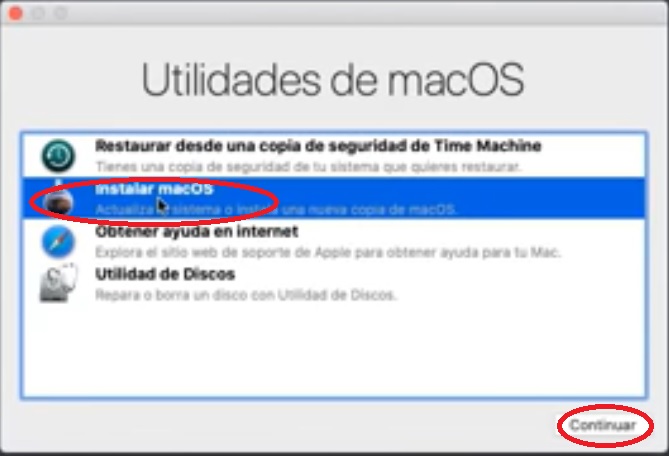
Now we choose our language, choose yours, I will choose Spanish then the system ask for MacOS utilities, choose Disks Utility and click ok
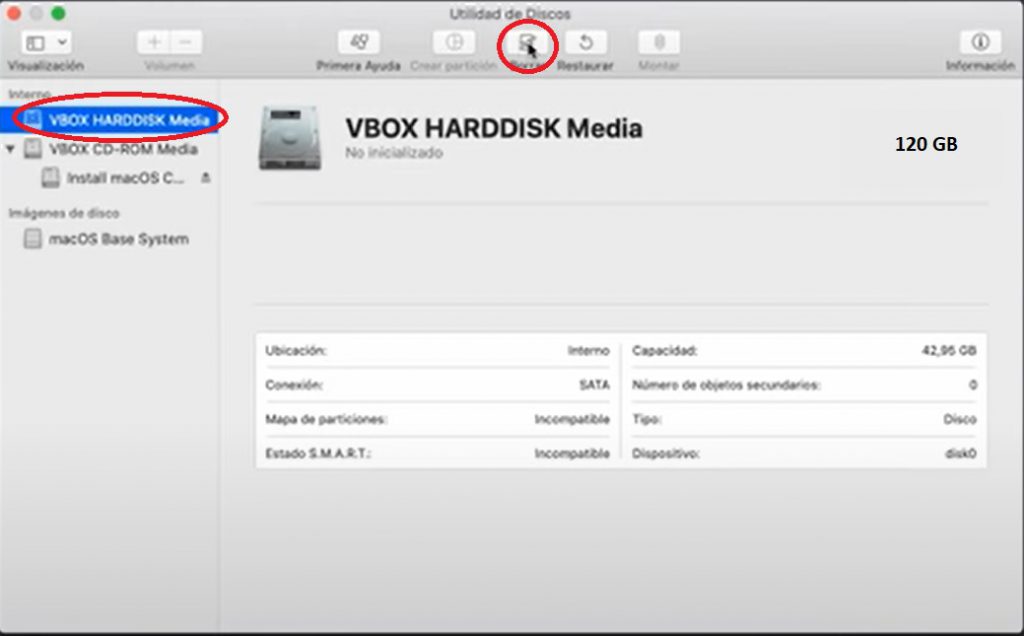
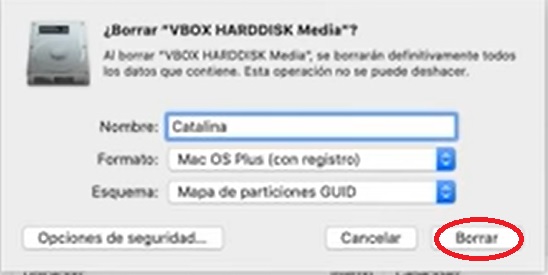
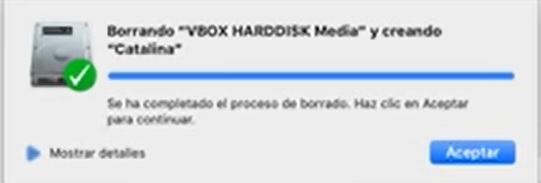
Now we choose the 120 GB disk we made for the system, and click Erase in order the system could format the virtual disk
Once we have a drive to install Mac we come back to the previous screen an we click Install MacOS and then continue
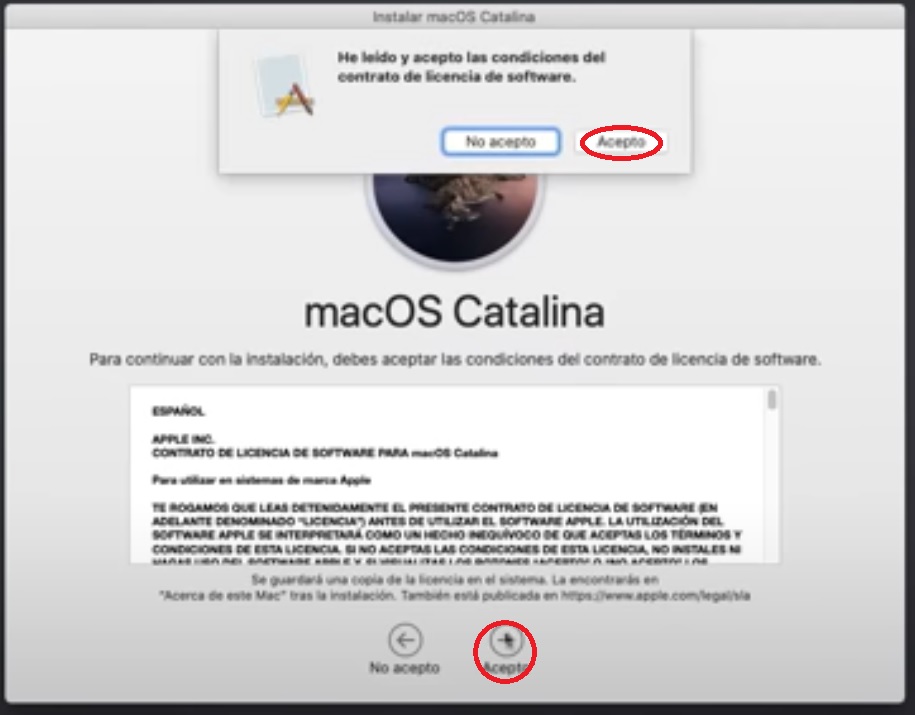
The process of installation could take long time, restarting the machine several times Now we click Acept
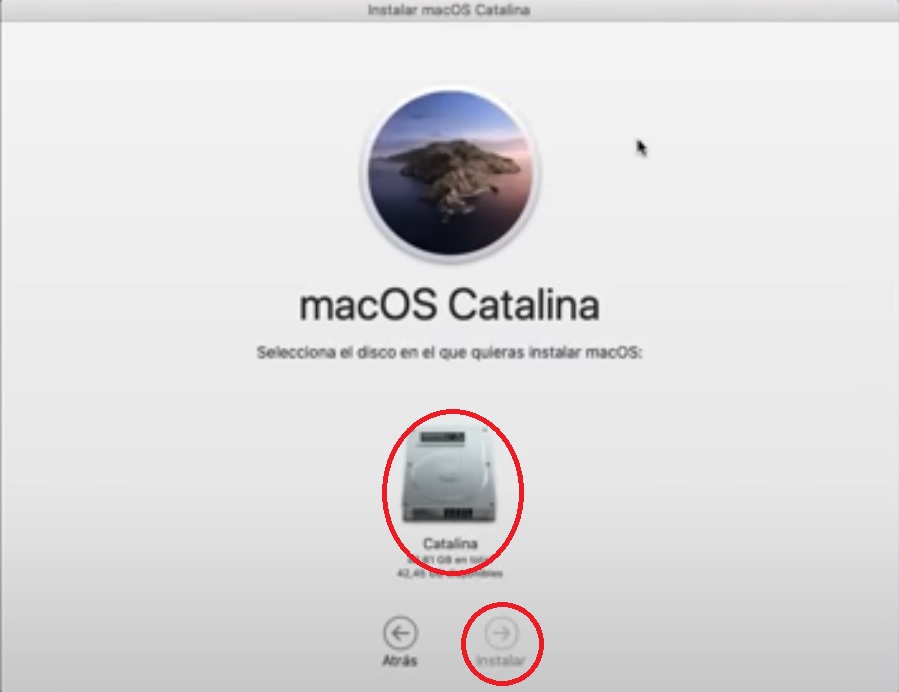
Now we click on the hard drive and install
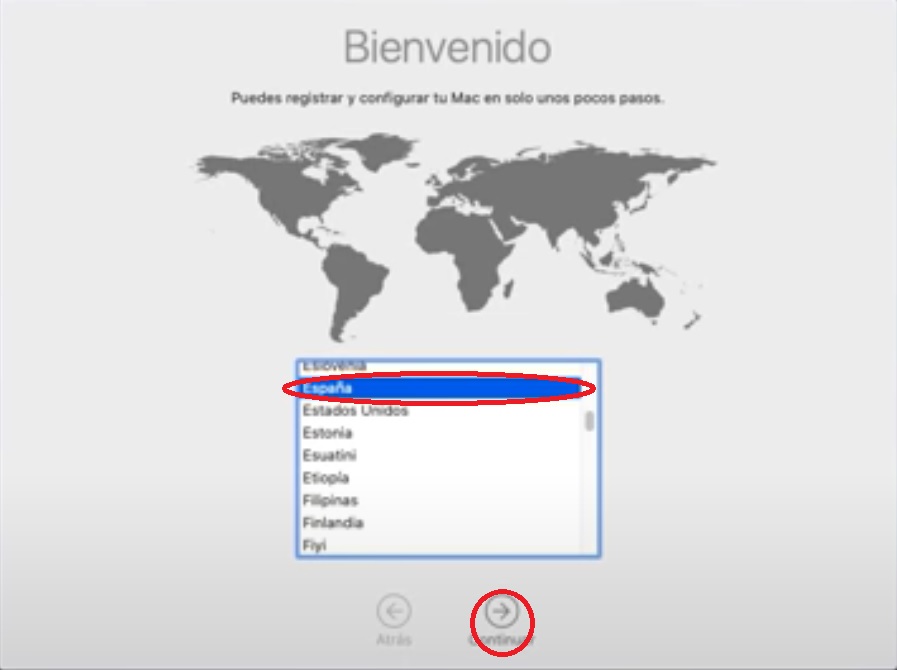
Then choose your country an then continue
Now you choose language, click continue
Continue again
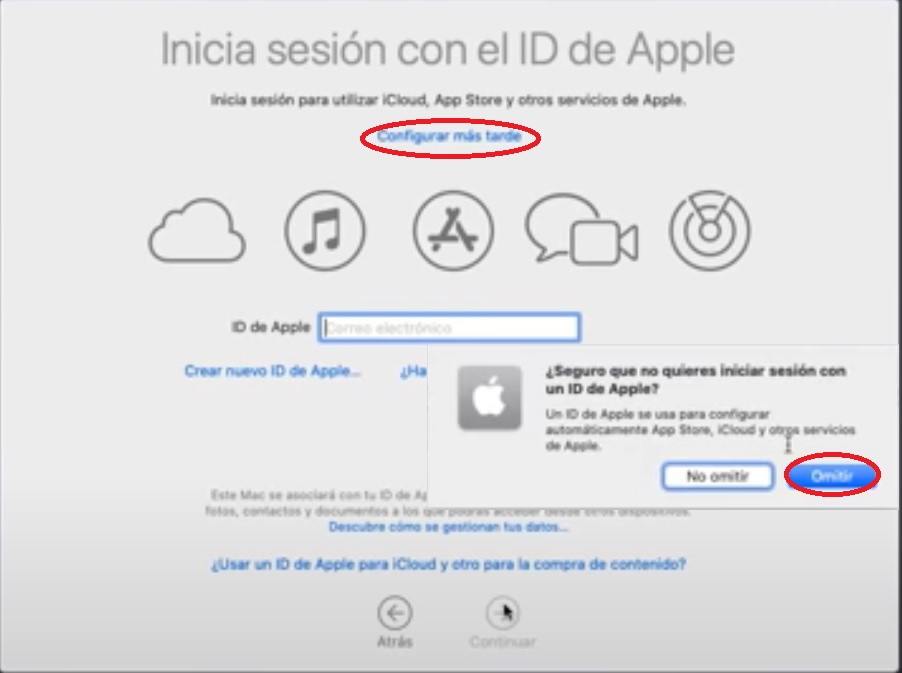
At ID Apple we choose configure later
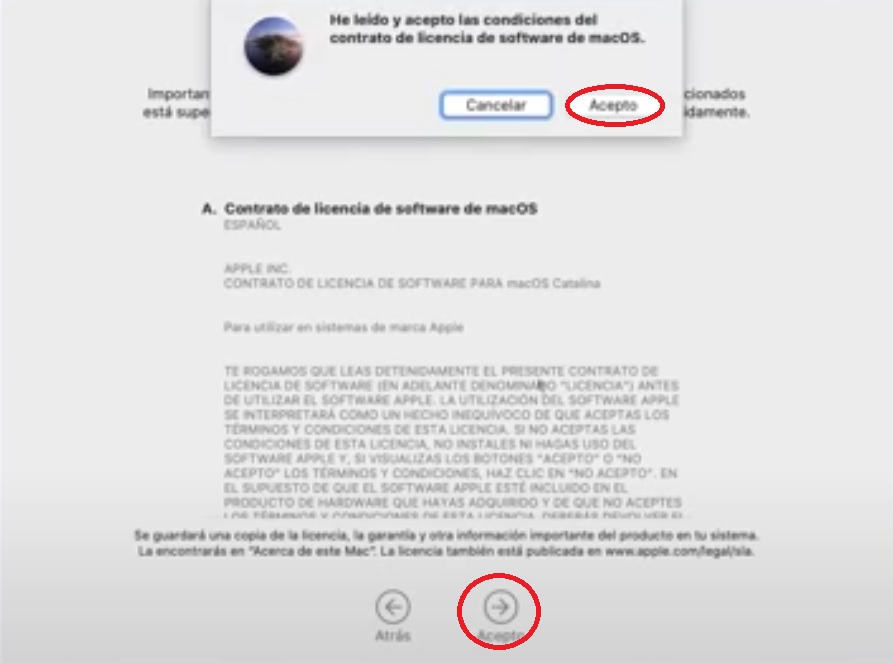
Accept the conditions
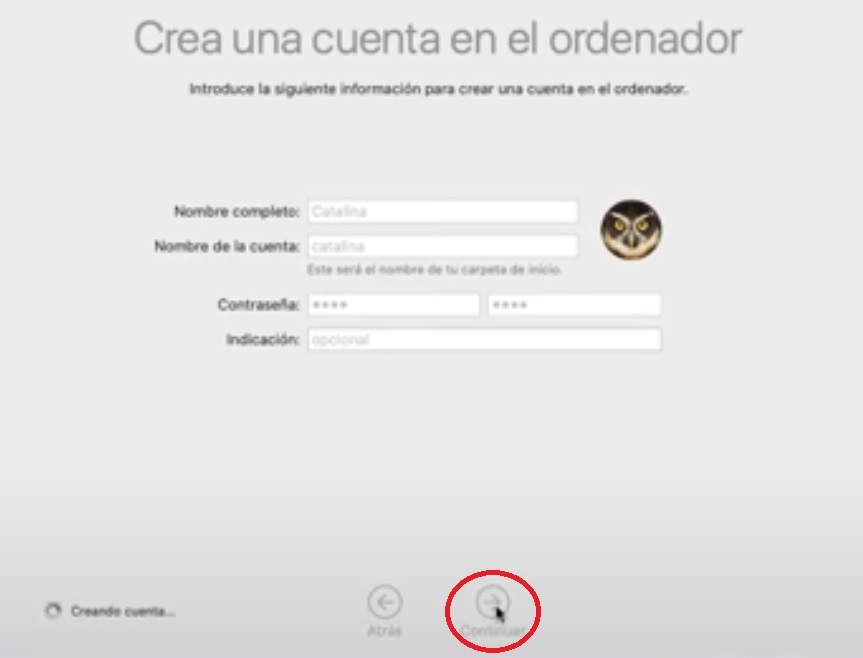
Set user and password
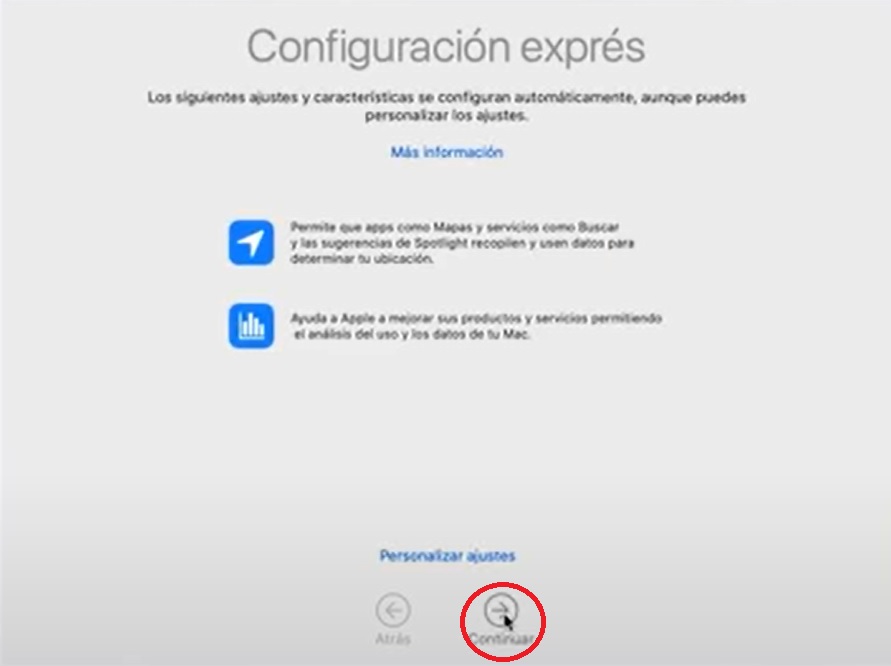
Click continue in the express configuration
Continue … Continue … Continue until the end .
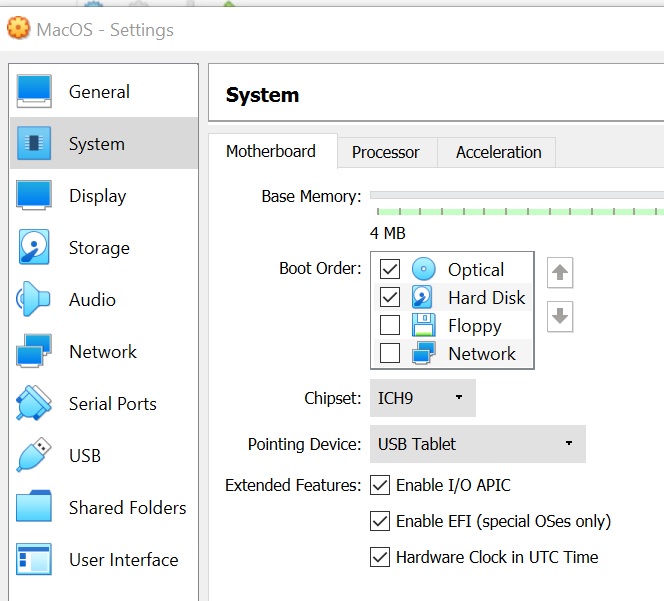
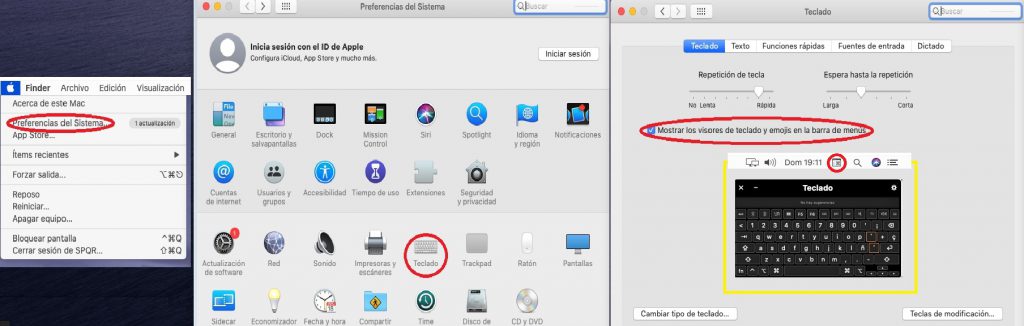
Because Ubook is a tablet I recommend you enable the Virtual Keyboard on Mac OS. Go to the Apple menu then open System Preferences Go to “Keyboard” preference panel, and then choose the “Keyboard” tab Check the box next to “Show Keyboard & Emoji / Character Viewers in menu bar”
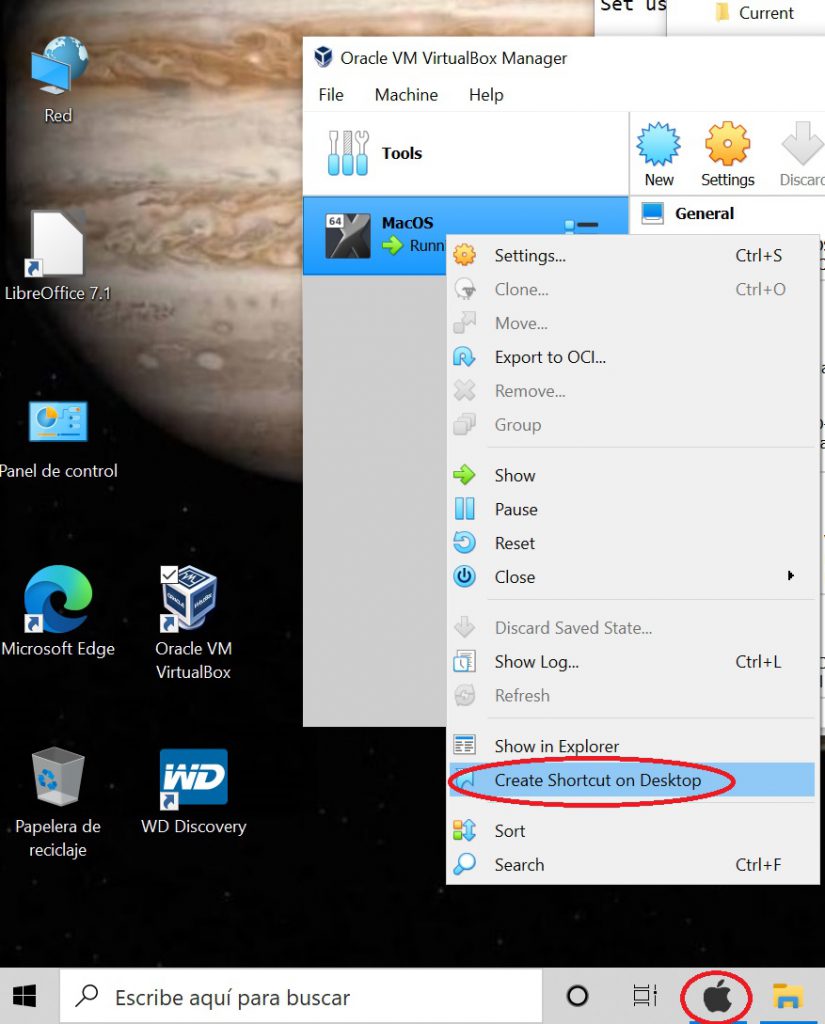
I also recomend you to make a Shortcut to the Virtual Mac machine and move it to the Windows tools bar to open the machine and change easily with one click between Windows and Mac
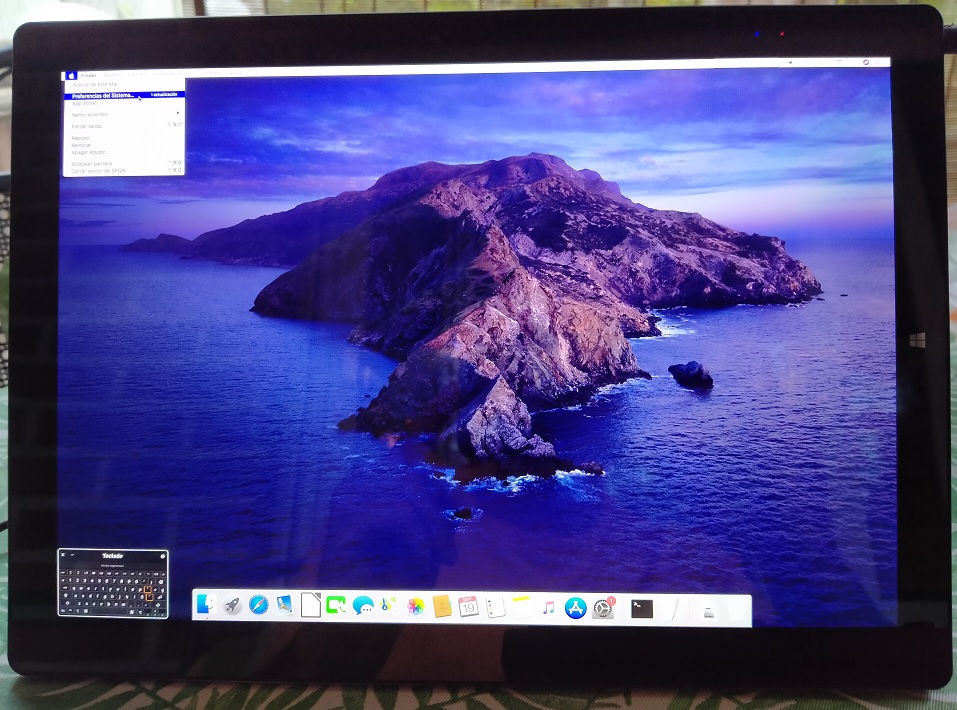
Et voilá this is how your CHUWI UBook Tablet looks now
I recommend once the MacOs virtual machine is installed, do not make the updates that MacOS proposes, because on many occasions after the update the system does not start and it is necessary to install it again.
Apex Sports is a good sports Addon for Kodi, and also includes various sports and non-sports channels, the FilmON platform deserves a prominent mention.
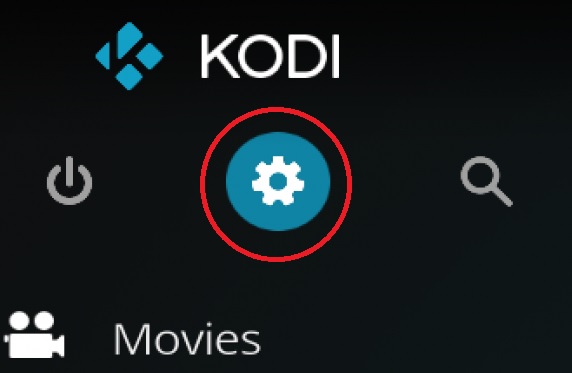
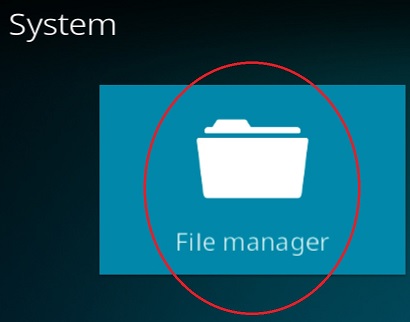
To install it just go to System in the Kodi main menu
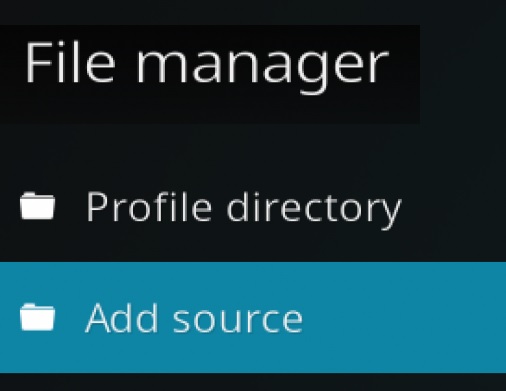
then select File manager
Now click on add source
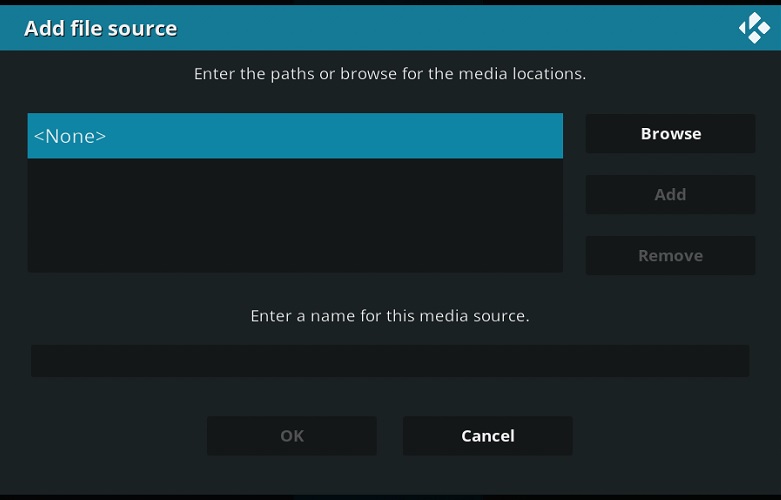
Click on <None> and type
https://arxtic-ape.github.io
and then select Done
Then type a name for this media source, for example arxtic
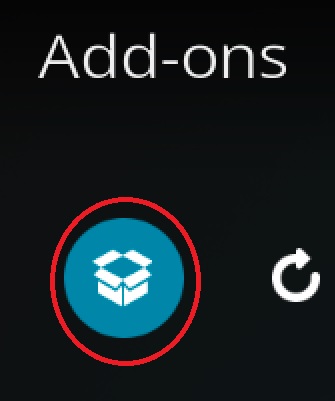
Now go back to Add-ons and click on the box
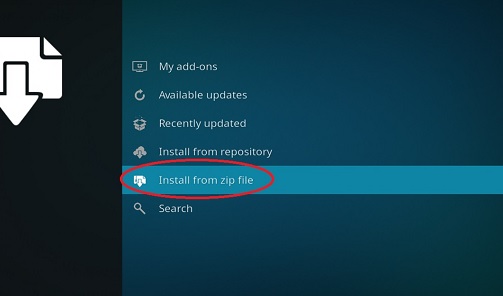
Click Install from zip file
Then choose arxtic, then repository.arxtic-ape-x.x.xx.zip
Now choose Install from repository , arxtic-ape repository, an then choose Video-addons and finally choose Apex Sports.
Now wait for the repository to be installed untill the Apex Sports icon appear in the top right corner.
Apex Sports is now installed, enjoy the best sports and general entertainment channels.
If we want to avoid that when we try to update WordPress or any plugin, WordPress asks us for the credentials to update by FTP, we only have to add a line to the wp-config.php file.
For this we open a terminal.
In the terminal we type the following command to edit the file wp-config.php:
sudo io.elementary.code /opt/lampp/htdocs/wordpress/wp-config.php
Now we add the line:
define(‘FS_METHOD’, ‘direct’);
So it shows like this
/** The Database Collate type. Don’t change this if in doubt. */ define( ‘DB_COLLATE’, » );
/** Para que no haga las actualizaciones por FTP. */ define(‘FS_METHOD’, ‘direct’);
/**#@+
We save the file and from this moment the WordPress update will be direct, without FTP.