Installing Elementary OS

If your Windows operating system has become unstable and after reinstalling it rejects your OEM license number or you simply decide change from a proprietary and inefficient operating system for an open and efficient one in the need of hardware resources, Elementary OS is the best option.

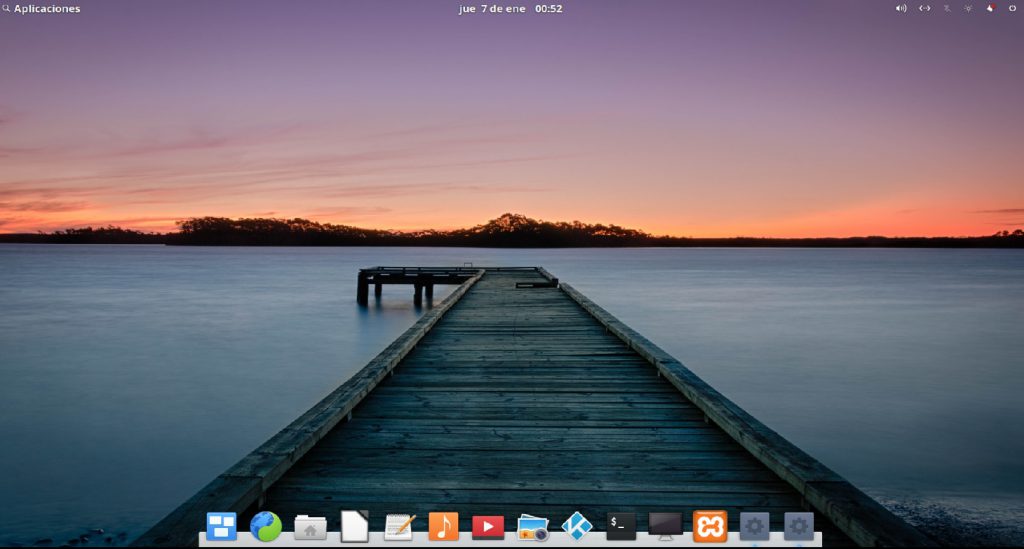
Elementary OS is a Linux distribution derived from Ubuntu which is based on Debian and presents an elegant desktop with a style reminiscent of the expensive and limited Mac OS.

Elementary OS performs perfectly on practically any hardware, with an Intel i3 or similar and 4 GB of memory (RAM) runs really well.

You can download Elementary OS from here

To make an installation USB memory stick you can use Rufus by downloading it from here

To install from the USB memory Stick, you must restart your laptop starting the BIOS (this is done by holding down the escape key when restarting in some models such American Megatrends or by holding down the F2 key in others such as HP – consult your laptop documentation anyway-).

When in the BIOS enter into the Boot menu and disable Secure Boot.

Then select UEFI USB as the first boot option, after this exit the BIOS by choosing Quit & Save.

Then the laptop will restart showing the following screen

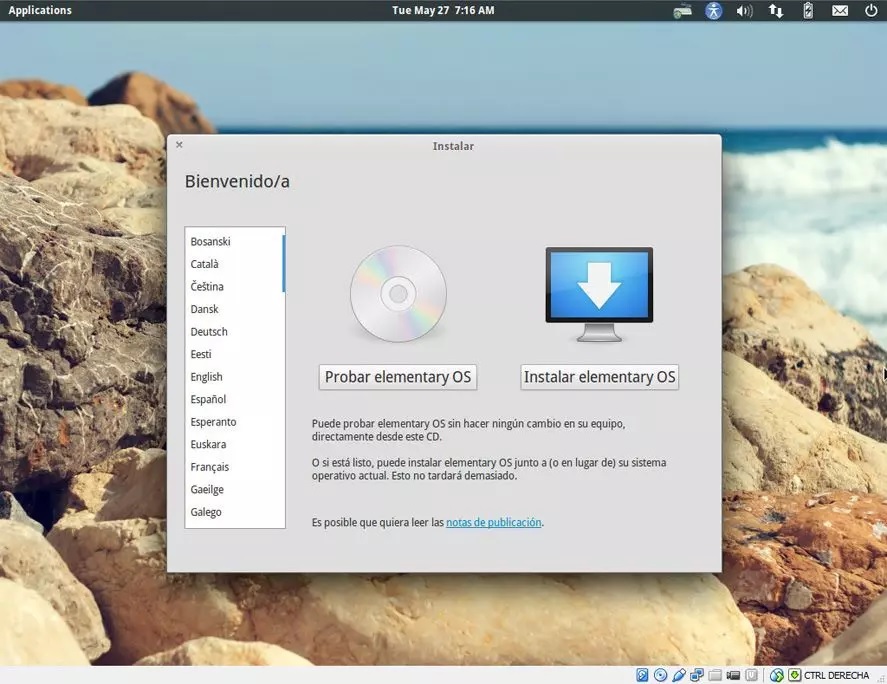
Here you can choose to test the Elementary OS without installing it or installing it directly.

I recommend trying it first to see if you like it and if it is compatible with your laptop hardware.

Enjoy your new operating system, it will pleasantly surprise you.

Tweaks, configure and minimize windows in Elementary OS

One of the first things you’ll miss in Elementary OS is that the windows cannot be minimized.

But don’t worry, this has a solution, install Tweaks.

Open the command window

From the command window type:

sudo apt install software-properties-common -y

sudo will request the user’s password

then type:

sudo add-apt-repository ppa:philip.scott/elementary-tweaks -y

and finally

sudo apt install elementary-tweaks -y

Tweks is installed.

Now go to Applications – System Settings – Tweaks

From Window Controls select the type of window you prefer, like Windows, Ubuntu, OS X where the button to minimize window will appear.

Here you can also select the type and size of the font, cursor, icons etc.

Installing Libre Office on Elementary OS

Libre Office is the ideal open source free office suite for any laptop that has nothing to envy to MicroSoft Office.

Its installation in Elementary OS is very simple.

Just open a command window

An then type:

sudo apt-get install libreoffice

sudo will ask for the user’s password

Now we can open Libre Office from Applications

If we prefer Libre Office in spanish we must type now in the command window

sudo apt-get install libreoffice-l10n-es

Now we can open Libre Office in spanish from Applications

Tesla comandos de voz

Cuando compre un producto de Tesla a través de un enlace de recomendación, usted puede recibir ventajas para el comprador y ventajas exclusivas de recomendaciones
Enlace al programa de referidos Tesla


Aplicaciones y configuración

«Abrir navegador, teléfono, cámara, ajustes de seguridad…»

«Buscar qué tiempo hace en Google…»

«Ir a www.tesla.com…»

Controles del vehículo

«Activar el modo centinela…»

«Activar los limpiaparabrisas, acelerar los limpiaparabrisas»

«Plegar/Desplegar los espejos»

«Cerrar el puerto de carga»

«Bloquear las puertas»

Controles de climatización

«Enciende la calefacción, el ventilador…»

«Pon el aire acondicionado, el modo de perro, el modo de acampada…»

«Sube la temperatura»

«Pon la temperatura del asiento del conductor a…»

«Baja la velocidad de los ventiladores…»

«Tengo frío»

«Recircular el aire»

Navegación

«Ir a casa, al aeropuerto…»

«Navegar a calle del Amparo 91…»

«Llévame a la universidad, al parque…»

«Hacer zoom»

«Activa el modo satélite, el tráfico…»

«¿Dónde hay supercargadores?»

«Detener navegación»


Teléfono

«Llamar a casa, a Marta a Roberto…»

«Enviar mensaje a David»

Multimedia

«Abre la música, Netflix, YouTube…»

«Reproducir canción»

«Buscar álbum»

«Silenciar»

Manual del Propietario Model 3

Tesla voice commands

When you purchase a qualifying Tesla product through a referral link, you may receive buyer benefits and exclusive referral benefits
Tesla Referral Link


Apps and Settings

«Open browser/phone/camera/lock settings…»

«Search Google for the weather…»

«Go to tesla.com…»

Car Controls

«Activate sentry mode»

«Increase screen brightness»

«Turn on windshield wipers/increase wiper speed»

«Fold/unfold side mirrors»

«Open charge port»

«Lock doors»

Climate Controls

«Set the temperature/fan…»

«Turn on the air conditioning/dog mode/camp mode…»

«Make it warmer»

«Set the driver’s seat warmer to…»

«Decrease fan speed…»

«I’m cold»

«Turn on recirculate»

Navigation

«Go home/to work/to the airport…»

«Navigate to 45500 Fremont Blvd…»

«Take me to the school/the park…»

«Zoom in»

«Turn on satellite mode/traffic…»

«Display Superchargers/Destination Chargers…»

«Stop navigation»

«Mute voice guidance»


Phone

«Call home/Franz/Syd…»

«Text message David»

Media

«Open music, Netflix/YouTube…»

«Play…»

«Search for…»

«Mute media»

Model 3 Owner’s Manual

Installing the Kodi addon Asgard

Asgard is a one of the best entertainment TV and sports Addon for Kodi.

To install it just go to System in the Kodi main menu

then select File manager

Now click on add source

Click on <None> and type

https://mylostsoulspace.co.uk/repo/

and then select Done

Then type a name for this media source, for example narcacist

Now go back to Add-ons and click on the box

Click Install from zip file

Then choose narcacist, then repository.NarcacistWizard.zip

Now choose Install from repository , Narcacist’s Wizard Repository, an then choose Video-addons and finally choose Asgard.

Now wait for the repository to be installed untill the Asgard icon appear in the top right corner.

Asgard is now installed, enjoy the best TV entertainment and sports channels.

Installing the Kodi addon The TvApp

The TV App is a fabulous live streaming Kodi Addon that provides live channels, there are various categories of channels to choose from for as Live TV and Sports.

To install it just go to System in the Kodi main menu

then select File manager

Now click on add source

Click on <None> and type

https://mrgsi.github.io/glive/

and then select Done

Then type a name for this media source, for example Glive

Now go back to Add-ons and click on the box

Click Install from zip file

Then choose Glive, then repository.glive-1.2.0.zip

Now choose Install from repository , G-Live Repository, an then choose Video-addons and finally choose The_TV_App.

Now wait for the repository to be installed untill the The TV App icon appear in the top right corner.

The TV App is now installed, enjoy the best TV channels.

Installing the Kodi addon TAPTV

TAPTV provides access to an extensive list of live TV channels from all over the world, specially Documentary, Entertainment, Kids, Sports and more. The listed channels are – among others – from the United States, United Kingdom, Canada and Germany.

To install it just go to System in the Kodi main menu

then select File manager

Now click on add source

Click on <None> and type

https://th3l48.github.io/TheLab/

and then select Done

Then type a name for this media source, for example TheLab

Now go back to Add-ons and click on the box

Click Install from zip file

Then choose TheLab, then repository.thelab-x.x.x.zip

Now choose Install from repository , The Lab Repository, an then choose Video-addons and finally choose TAPTV.

Now wait for the repository to be installed untill the TAPTV icon appear in the top right corner.

TAPTV is now installed, enjoy the best TV channels.

Local access to Western Digital My Cloud Home stops to work

Recently the local access to MyCloudHome stops to work. Since I enabled my local user for my network I was able to see and access my files on both Windows and Mac devices inside my house.

Now when I try to access by using my user it doesn’t show me any of the files I have stored under it. I only can see Public & TimeMachineBackup.

If I try to stop de local access I get the error:

“An error occurred Internal Server Error”

I also tried to change the local user name as the same error shows internal server error.

The solution is to Clear Device Settings on My Cloud Home and ibi .

Your device restarts an then enable local access again

Important: When enabling local access as local user write the shared resource name.

Now you can see finally your files.

Hiding the post date in WordPress

The easiest and simplest way to prevent the post date from appearing in WordPress without using plugins is to do it from the menu

Appearance => Customize => Additional CSS

and here write the following:

time.entry-date.published {
display: none;
}

And now we just need to Publish

With this we prevent the publication date from appearing in the posts.