In order to be able to use Windows and Mac OS simultaneously on a Windows tablet, we have installed a Mac OS virtual machine using VirtualBox on a Chuwi Ubook tablet.
Chuwi Ubook tablets come with the 64-bit Intel Celeron Gemini-Lake N4120 processor, with 8GB of RAM and 256GB of SSD.
They bring Windows 10 pre-installed.
These features allow them to run simultaneously Windows 10 and MacOS with enough agility to work comfortably.
As we have said Windows 10 comes pre-installed, then we only have to install MacOS on a virtual machine inside of the tablet so that they can run simultaneously.
Make sure you have a license to use both operating systems.
To do this you can download the Mac OS from Apple’s website.
I recommend the last steady one, MacOS Catalina.
Also you can download it from here
As a manager of virtual machines we will use VirtualBox for Windows.
We can download it from here
First we install VirtualBox platform packages for Windows Hosts and then VirtualBox Oracle VM VirtualBox Extension Pack.
If you need you can whatch this video How to install Virtual Box and its Extension pack Install Oracle Virtualbox 6, Extension Pack and VBoxManage on Windows 10
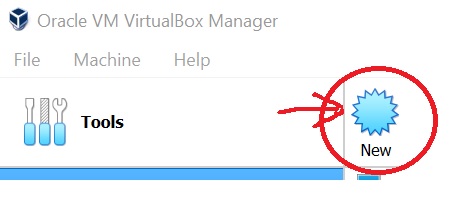
Now we open Virtual box and we choose Machine – New
We write the name that we will give to the machine, for example MacOS, and we choose type Mac Os X and version 64-bit
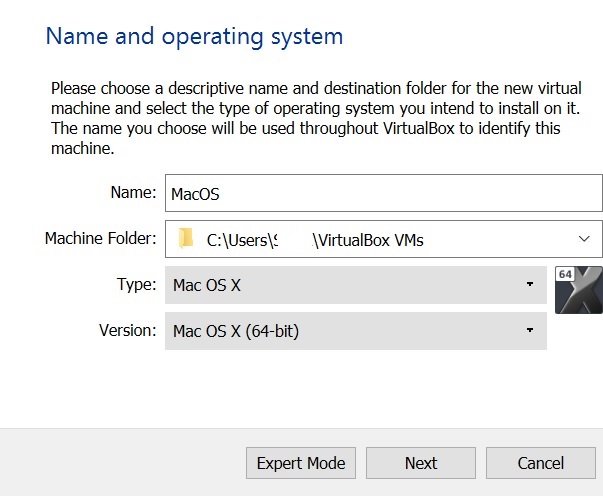
and we click next
Now as memory size we tipe 4096
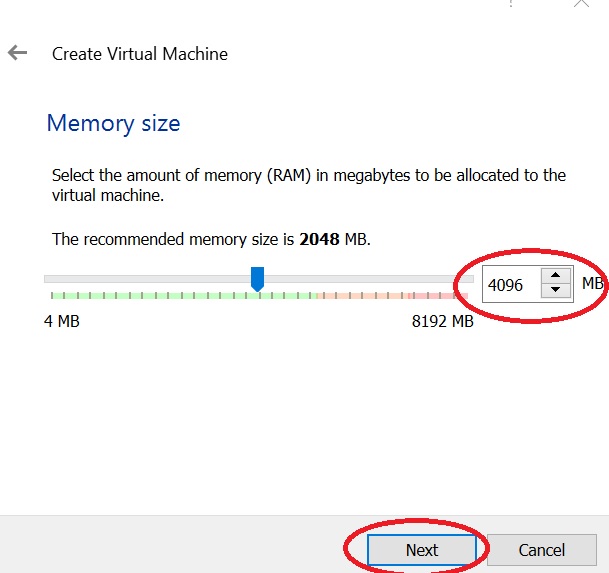
and we click next
Now we choose Create a virtual hard disk
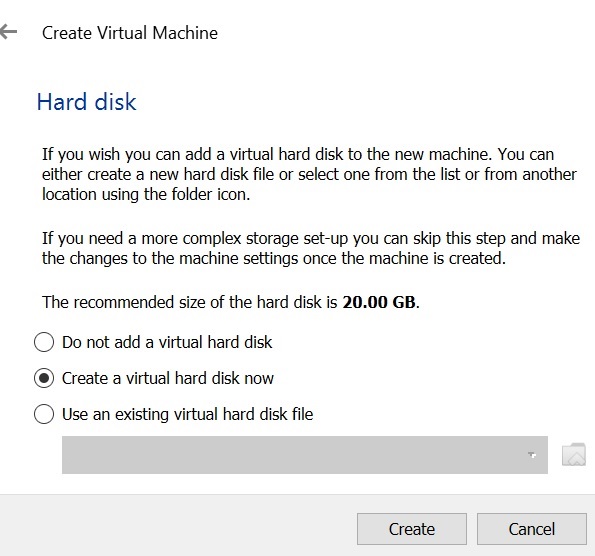
and we click Create
Now we choose as hard disk file type VDI
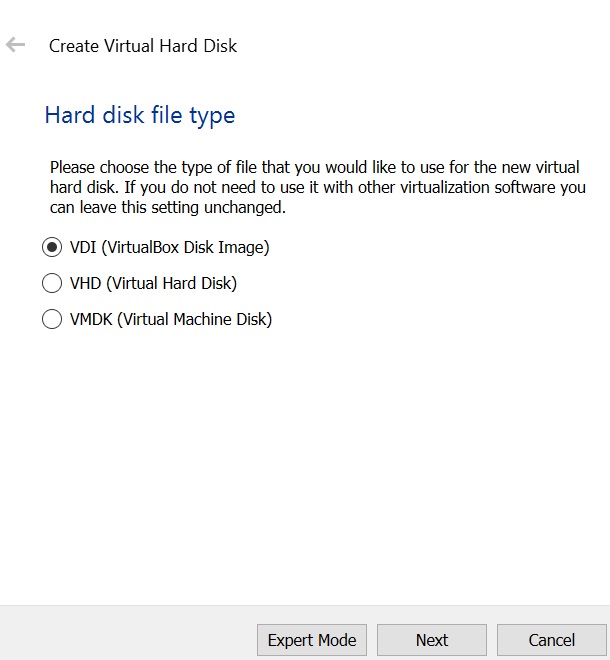
and we click next
Now we choose Dynamically allocated
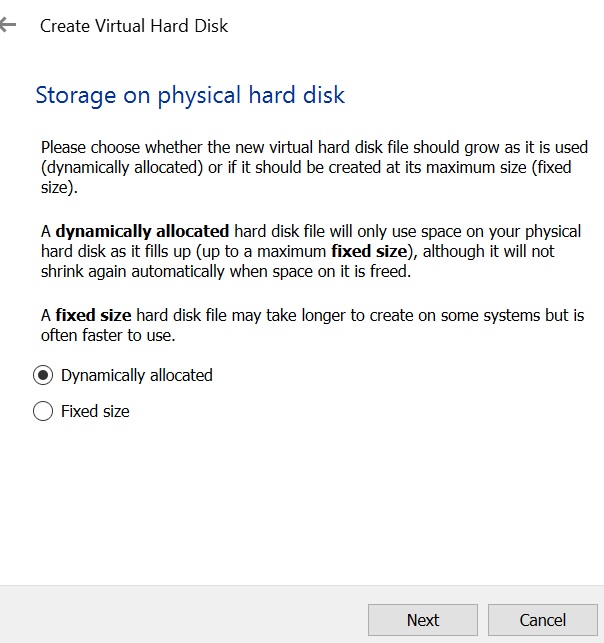
and we click next
Now we choose de file location and the size, I recomend 120GB
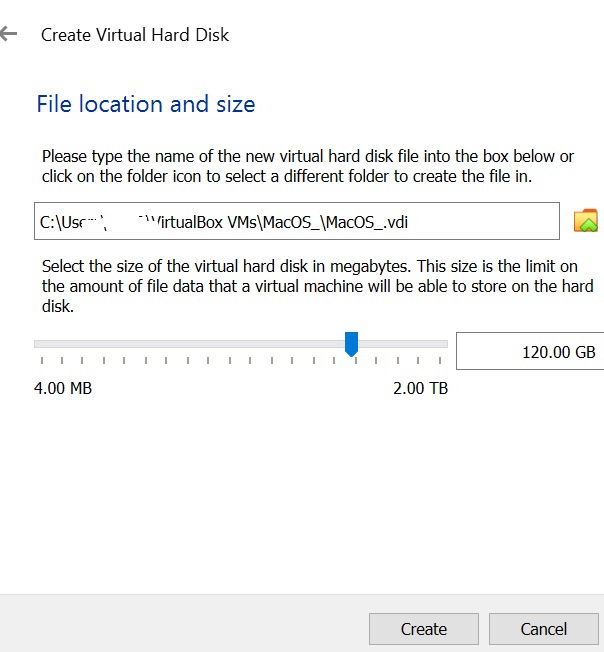
This is the maximun size the disk could ever have.
and we click Create
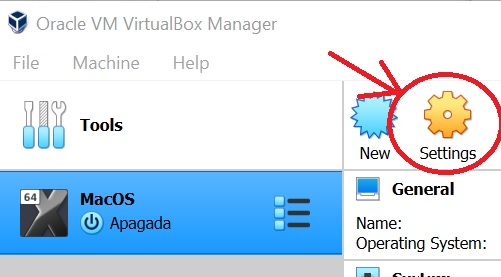
Now we must configure the machine
we choose Machine Settings
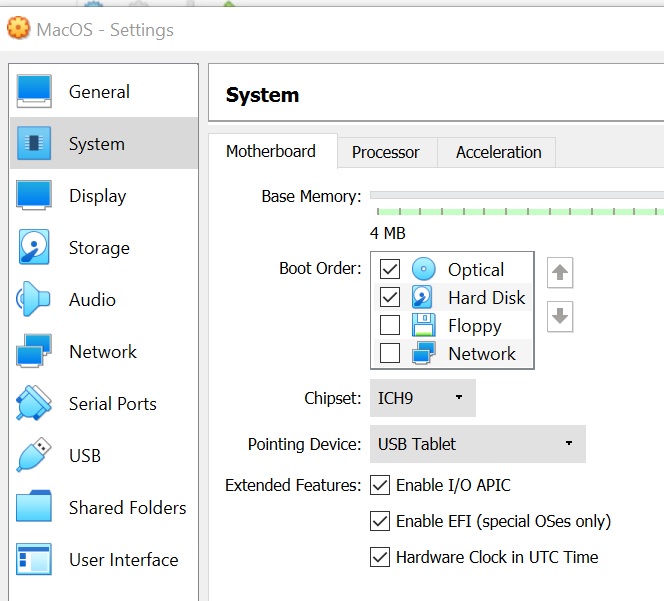
We click System and unselect Floppy (cause the Ubook hasn’t any floppy)
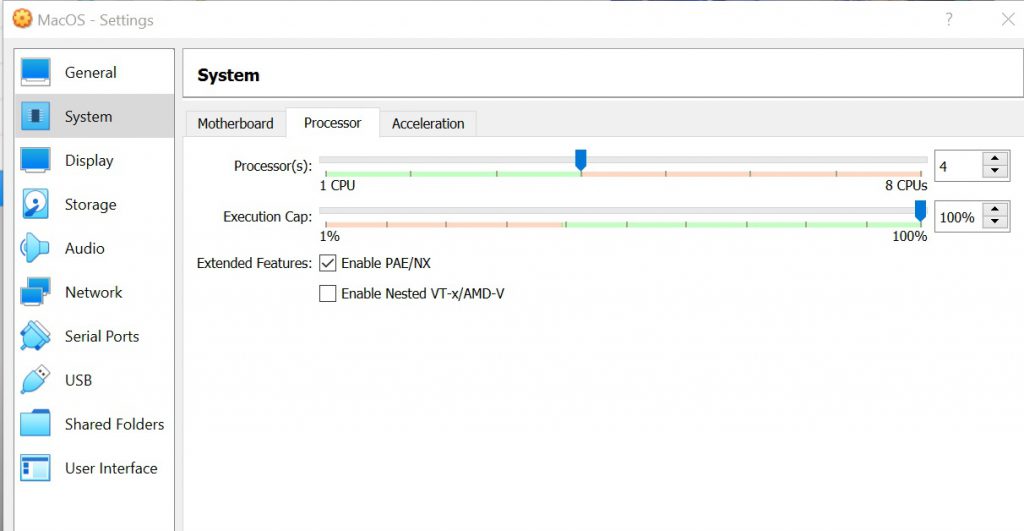
Don´t click Ok, now we click Processor and whe choose 4
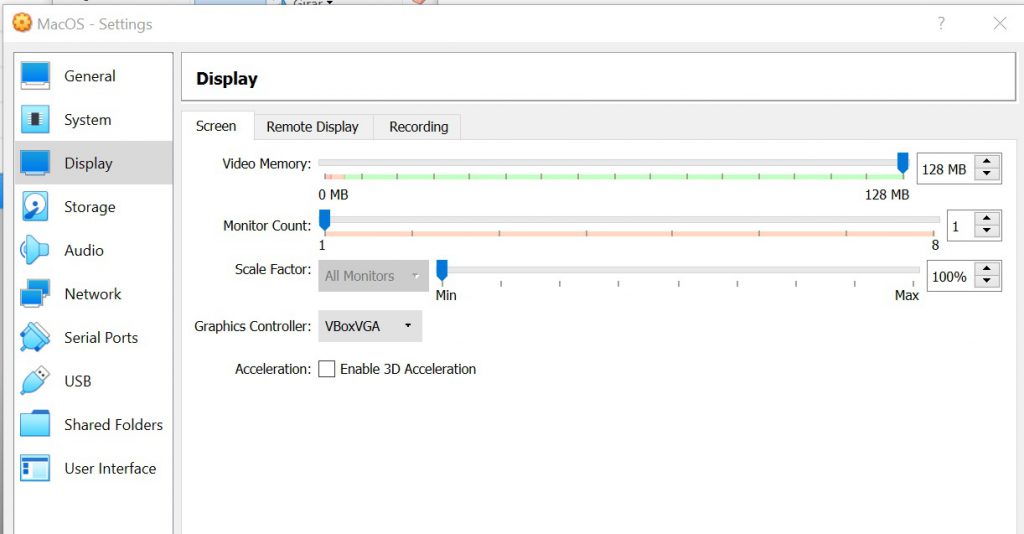
Don´t click Ok, now we click Dysplay and we choose 128 MB
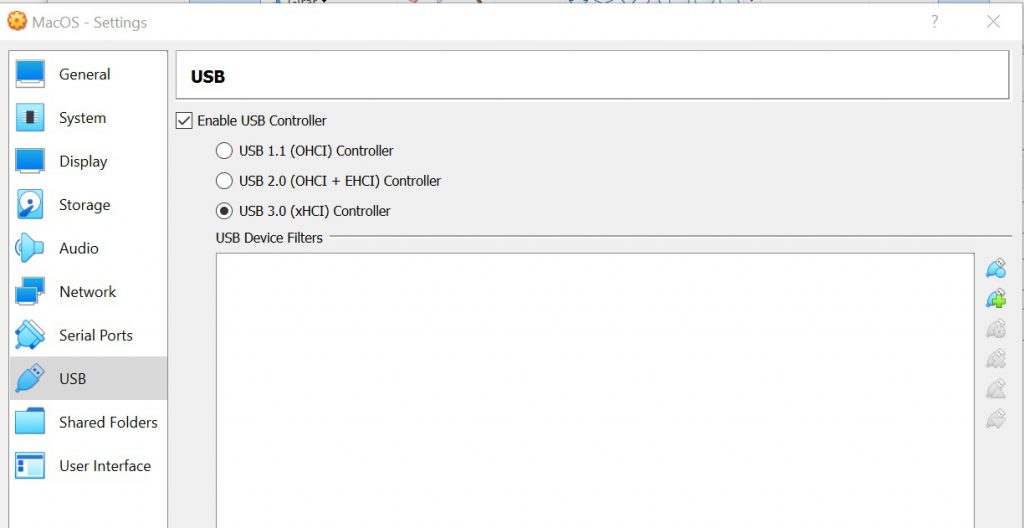
Don´t click Ok, now we click USB and we choose 3.0
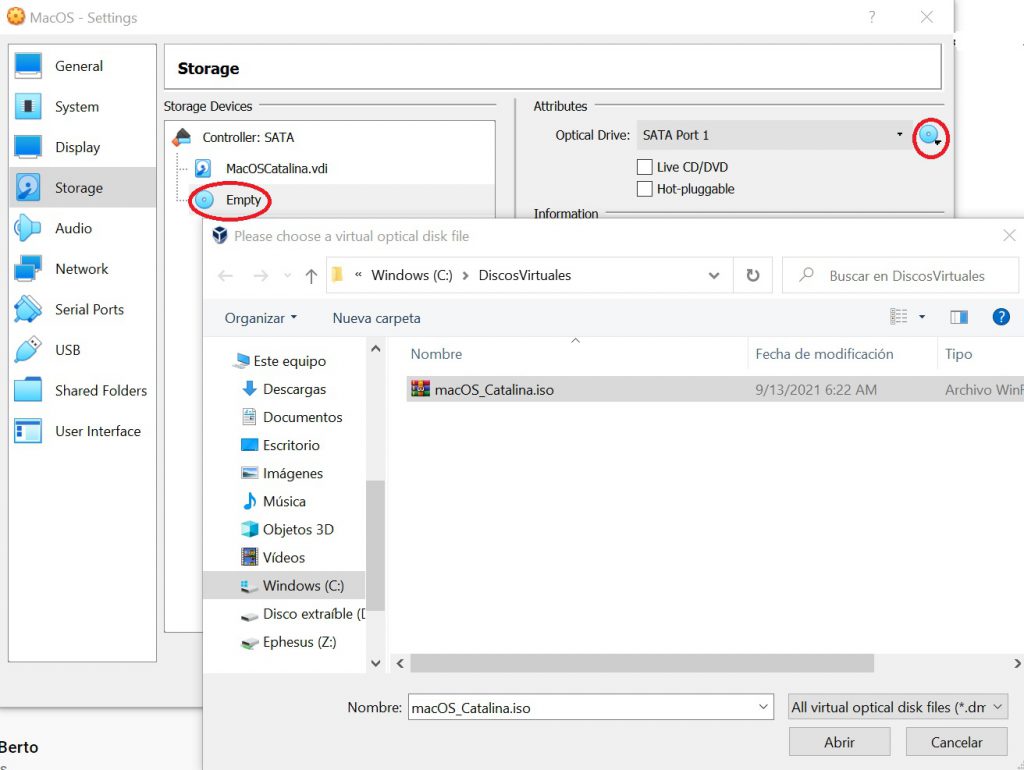
Don´t click Ok, now we click Storage and we Choose a disk file,
the one we downloaded previously macOS_Catalina.iso
Finally we click Ok
Now we choose File – Exit (to close Virtual Box)
Having Virtual Box closed we open in Windows a command window by typing cmd
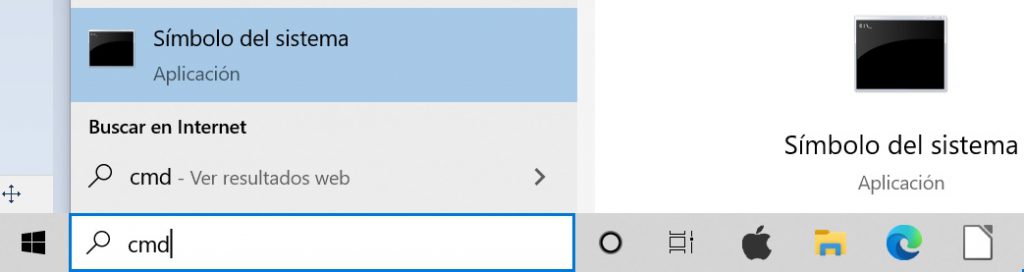
Inside the Windows command window, we copy and paste the following comands
(For Ubook X 12″ whith graphic resolution 2160×1440)
cd "C:\Program Files\Oracle\VirtualBox"
VBoxManage.exe modifyvm "MacOS" --cpuidset 00000001 000106e5 00100800 0098e3fd bfebfbff
VBoxManage setextradata "MacOS" "VBoxInternal/Devices/efi/0/Config/DmiSystemProduct" "iMac19,1"
VBoxManage setextradata "MacOS" "VBoxInternal/Devices/efi/0/Config/DmiSystemVersion" "1.0"
VBoxManage setextradata "MacOS" "VBoxInternal/Devices/efi/0/Config/DmiBoardProduct" "Mac-AA95B1DDAB278B95"
VBoxManage setextradata "MacOS" "VBoxInternal/Devices/smc/0/Config/DeviceKey" "ourhardworkbythesewordsguardedpleasedontsteal(c)AppleComputerInc"
VBoxManage setextradata "MacOS" "VBoxInternal/Devices/smc/0/Config/GetKeyFromRealSMC" 1
VBoxManage setextradata "MacOS" VBoxInternal2/EfiGraphicsResolution 2160x1440
(For Ubook 11.6″ whith graphic resolution 1920 x 1080)
cd "C:\Program Files\Oracle\VirtualBox"
VBoxManage.exe modifyvm "MacOS" --cpuidset 00000001 000106e5 00100800 0098e3fd bfebfbff
VBoxManage setextradata "MacOS" "VBoxInternal/Devices/efi/0/Config/DmiSystemProduct" "iMac19,1"
VBoxManage setextradata "MacOS" "VBoxInternal/Devices/efi/0/Config/DmiSystemVersion" "1.0"
VBoxManage setextradata "MacOS" "VBoxInternal/Devices/efi/0/Config/DmiBoardProduct" "Mac-AA95B1DDAB278B95"
VBoxManage setextradata "MacOS" "VBoxInternal/Devices/smc/0/Config/DeviceKey" "ourhardworkbythesewordsguardedpleasedontsteal(c)AppleComputerInc"
VBoxManage setextradata "MacOS" "VBoxInternal/Devices/smc/0/Config/GetKeyFromRealSMC" 1
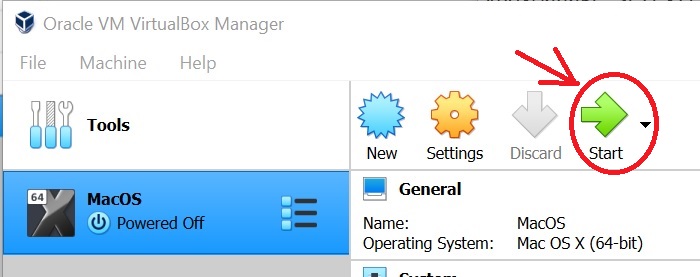
VBoxManage setextradata "MacOS" VBoxInternal2/EfiGraphicsResolution 1920x1080Now we open Virtual Box again and we run our new virtual machine
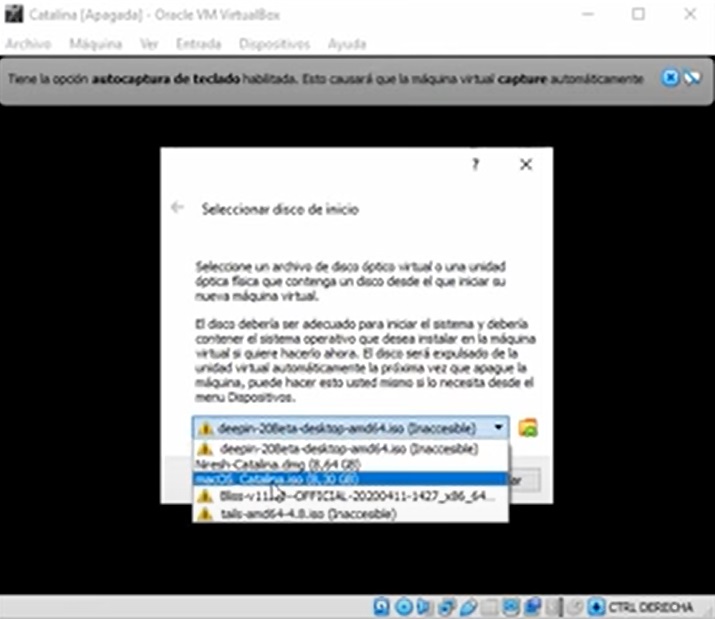
Now if the system asks for the ISO to run whe choose the iso we downloaded macOS_Catalina.iso
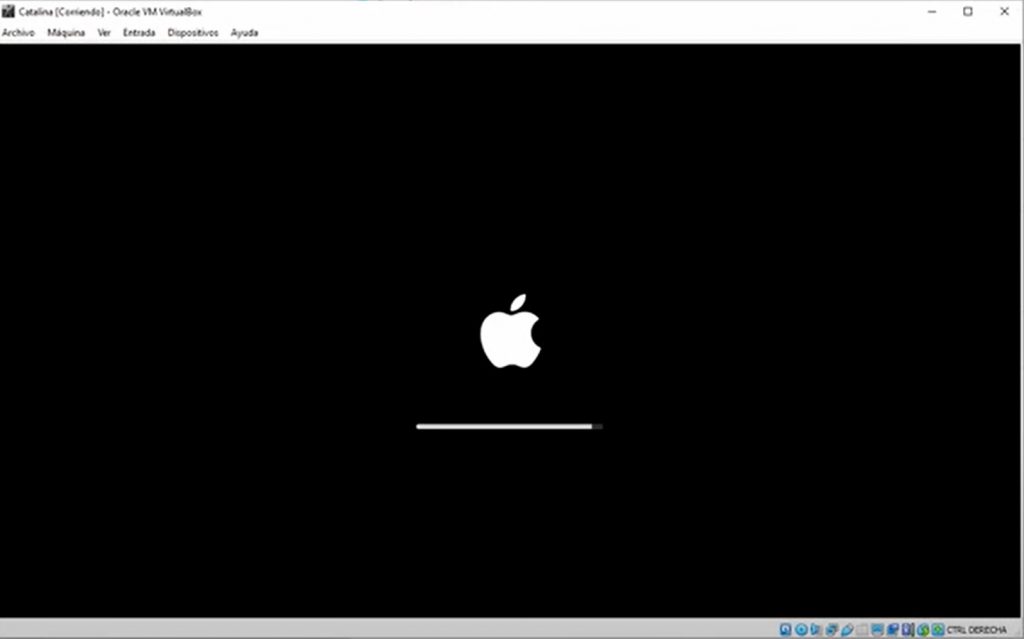
The system take it´s time to run an finally the apple shows up
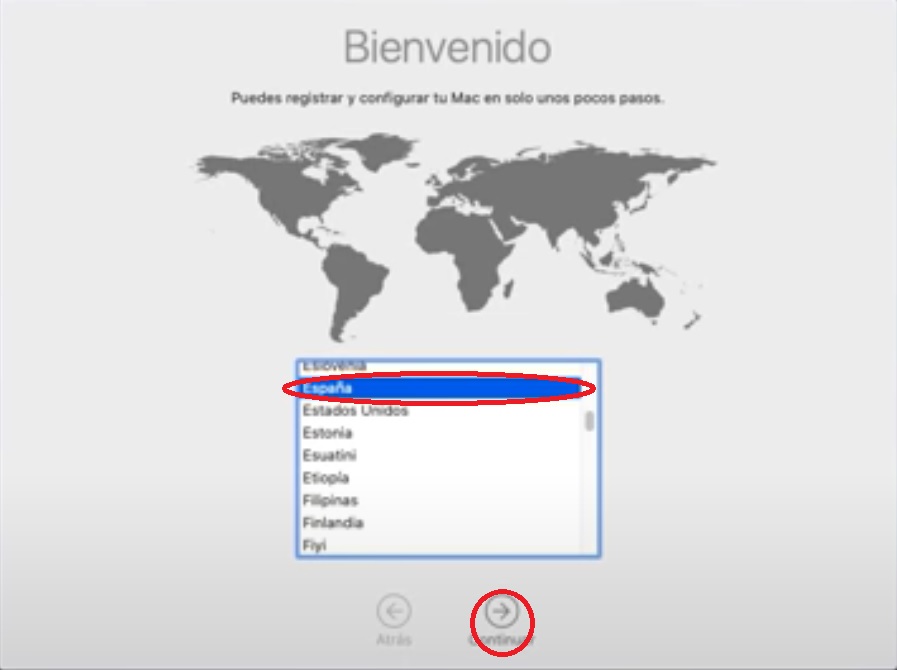
Now we choose our language, choose yours, I will choose Spanish
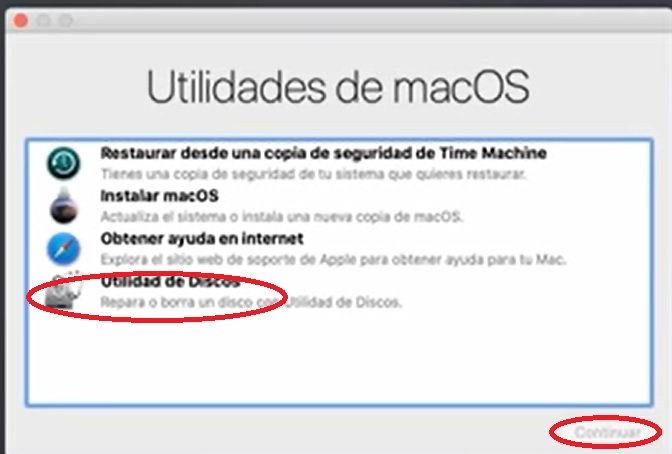
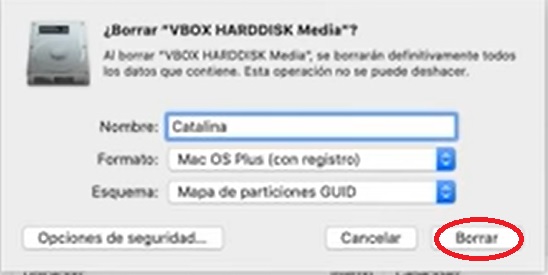
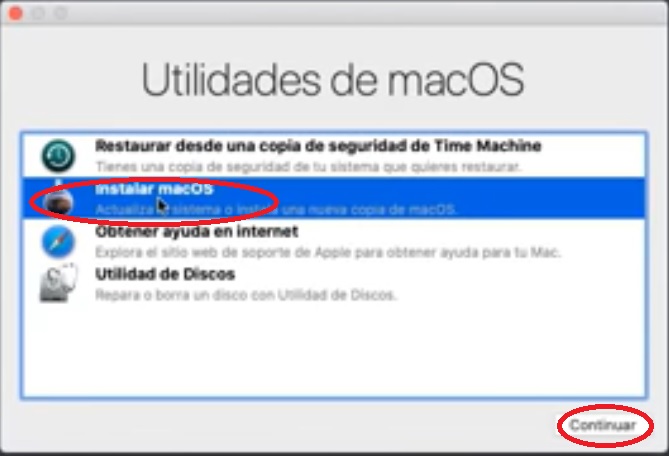
then the system ask for MacOS utilities, choose Disks Utility and click ok
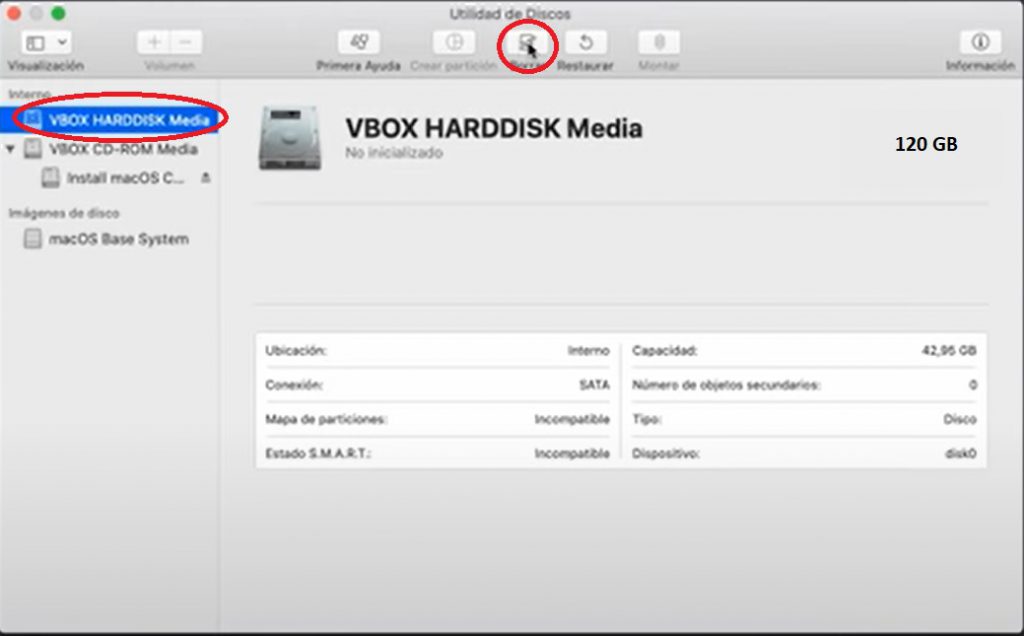
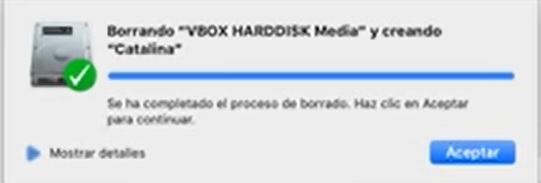
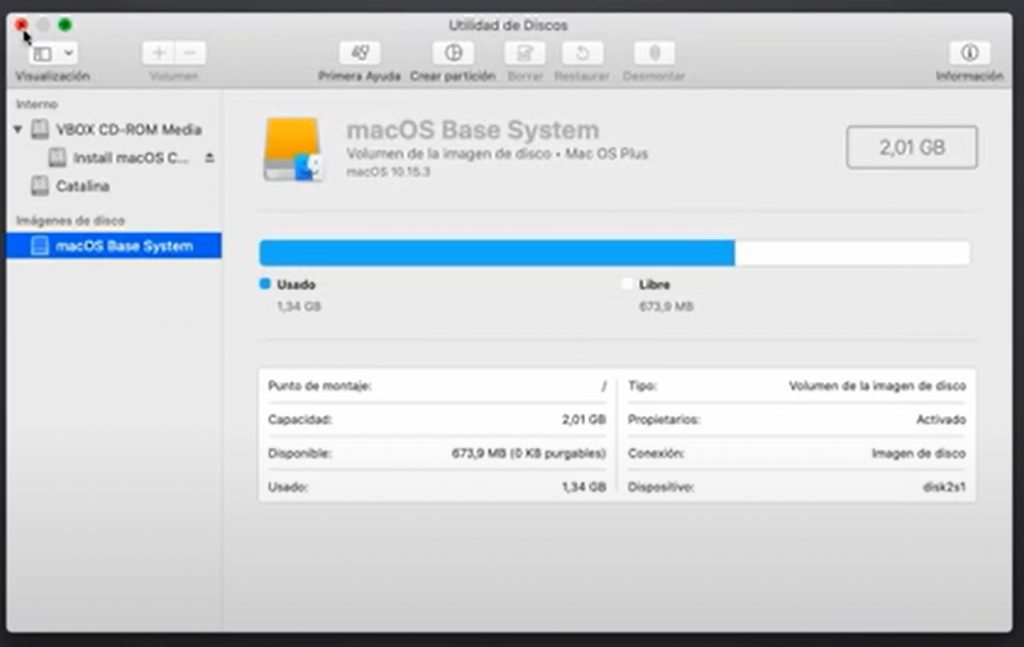
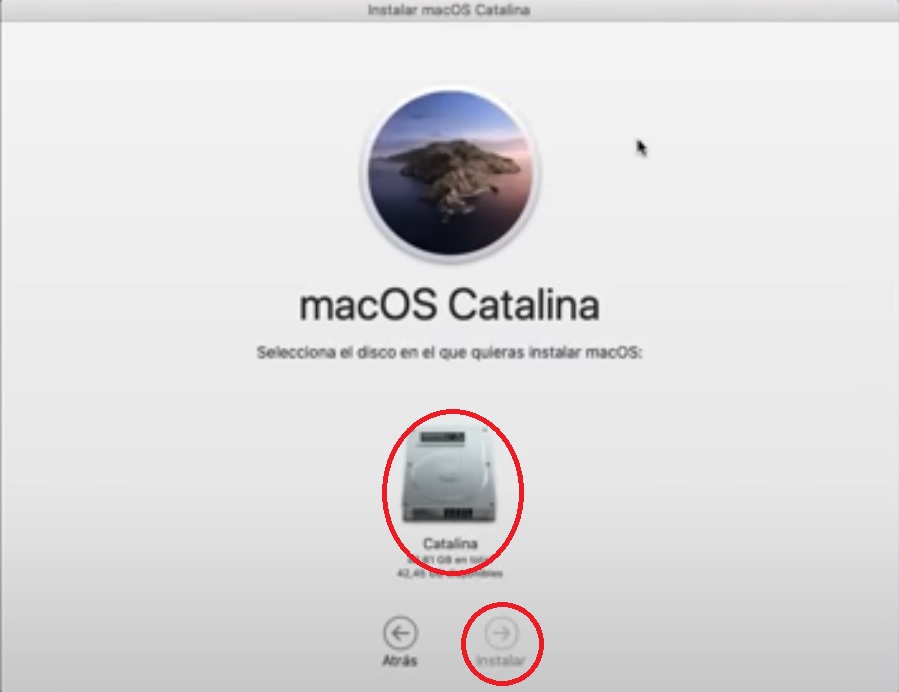
Now we choose the 120 GB disk we made for the system, and click Erase in order the system could format the virtual disk
Once we have a drive to install Mac we come back to the previous screen an we click Install MacOS and then continue
The process of installation could take long time, restarting the machine several times
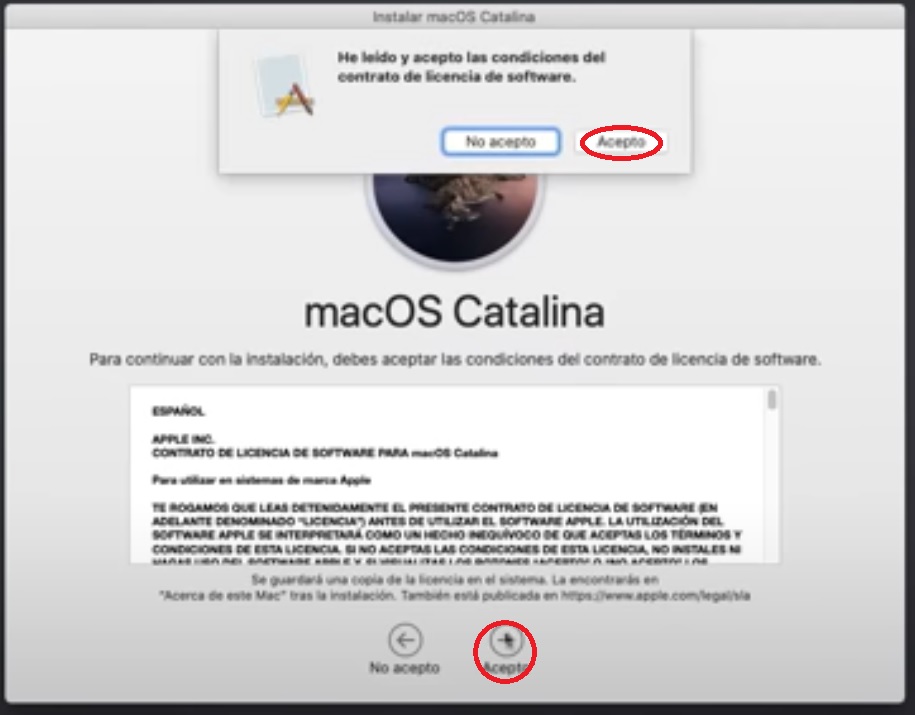
Now we click Acept
Now we click on the hard drive and install
Then choose your country an then continue
Now you choose language, click continue

Continue again
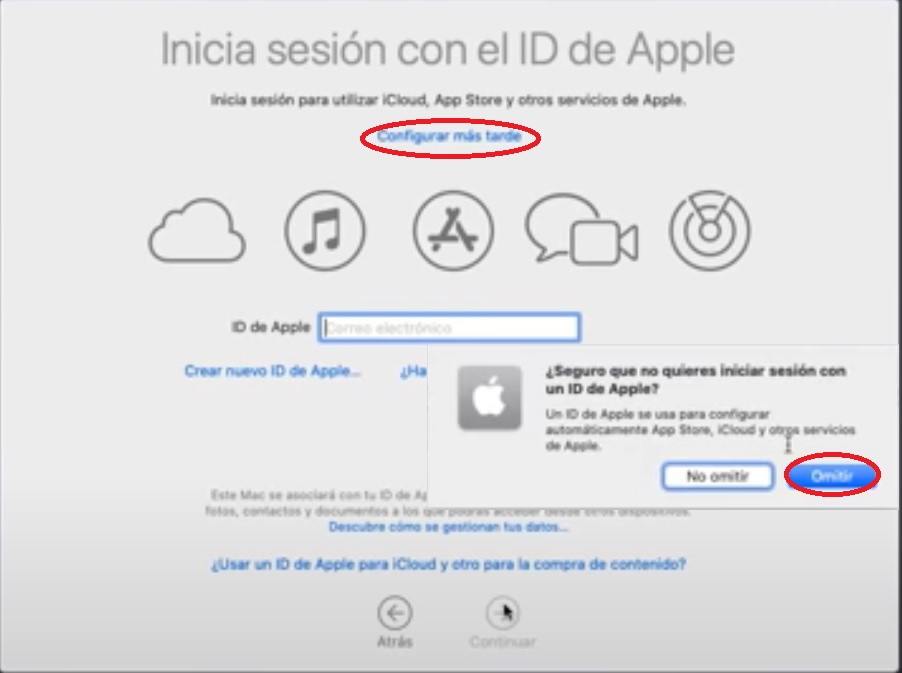
At ID Apple we choose configure later
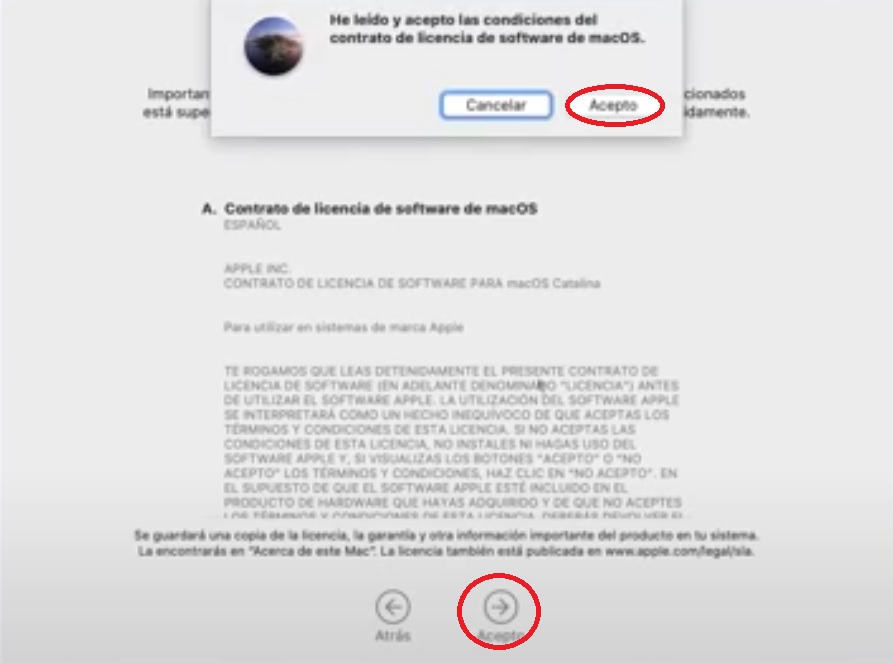
Accept the conditions
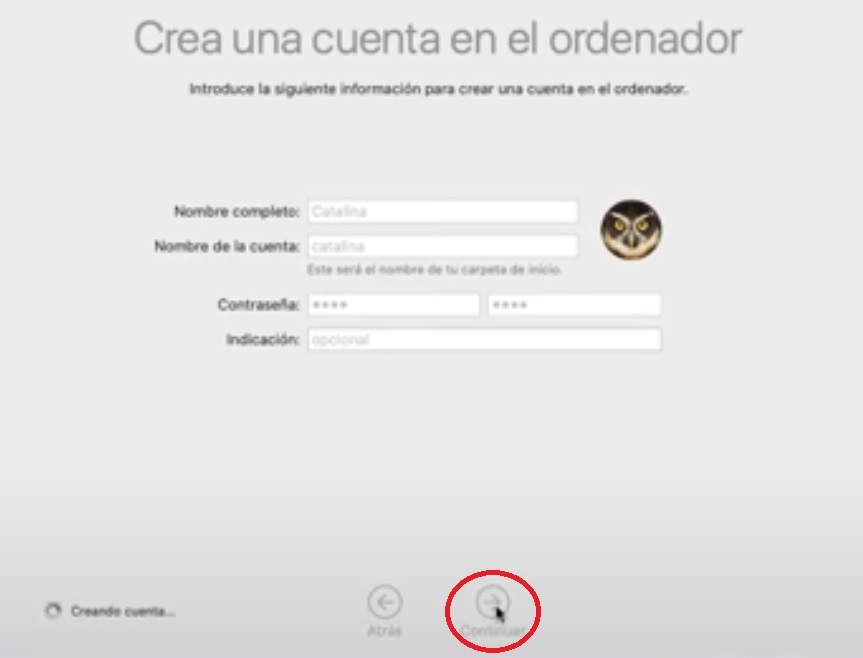
Set user and password
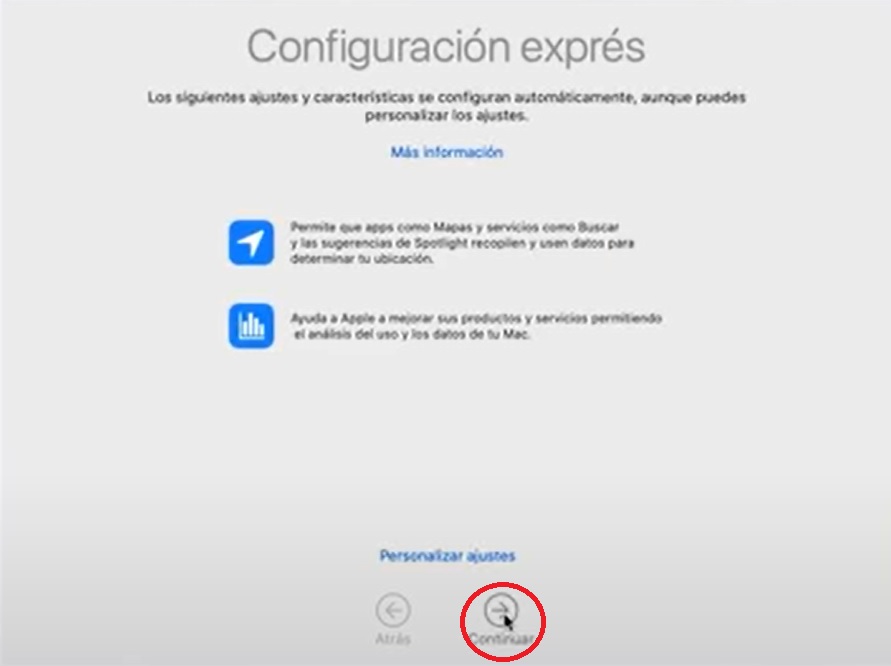
Click continue in the express configuration
Continue … Continue … Continue until the end .
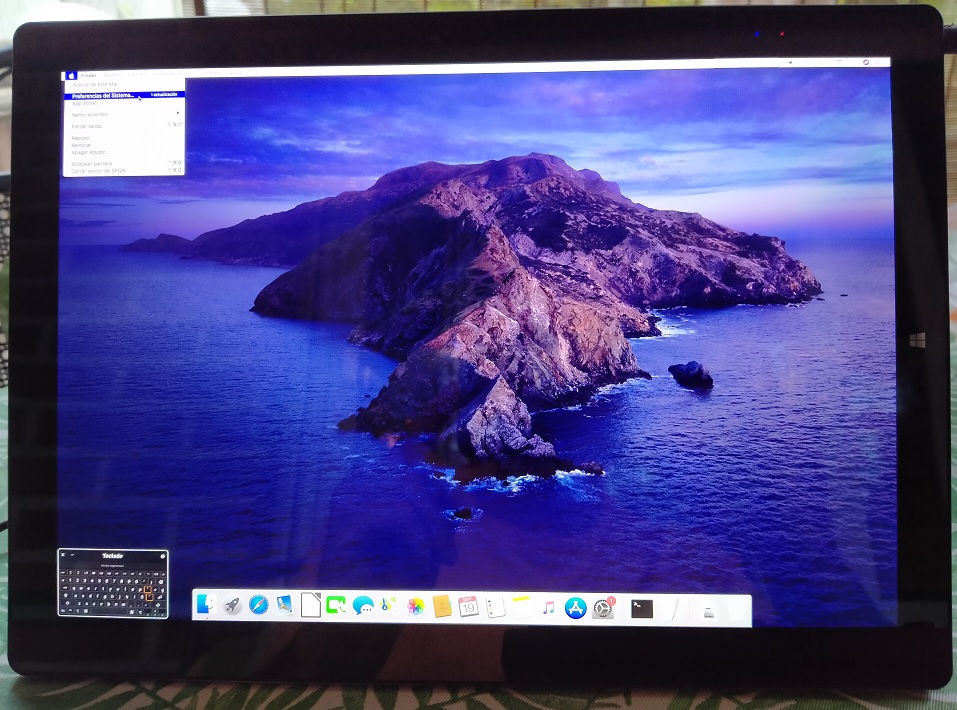
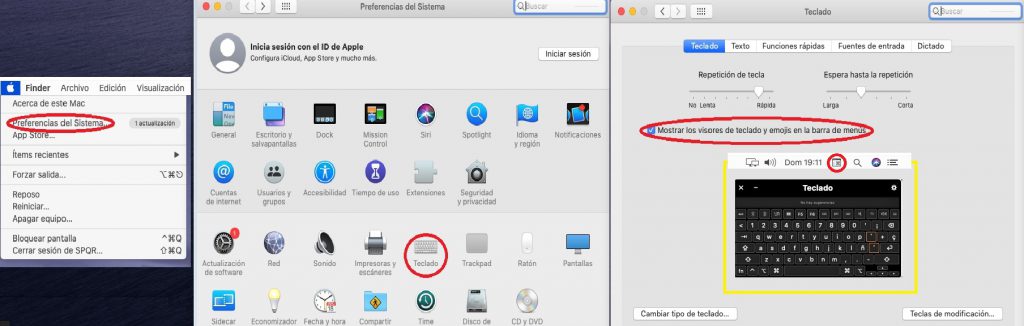
Because Ubook is a tablet I recommend you enable the Virtual Keyboard on Mac OS.
Go to the Apple menu then open System Preferences
Go to “Keyboard” preference panel, and then choose the “Keyboard” tab
Check the box next to “Show Keyboard & Emoji / Character Viewers in menu bar”
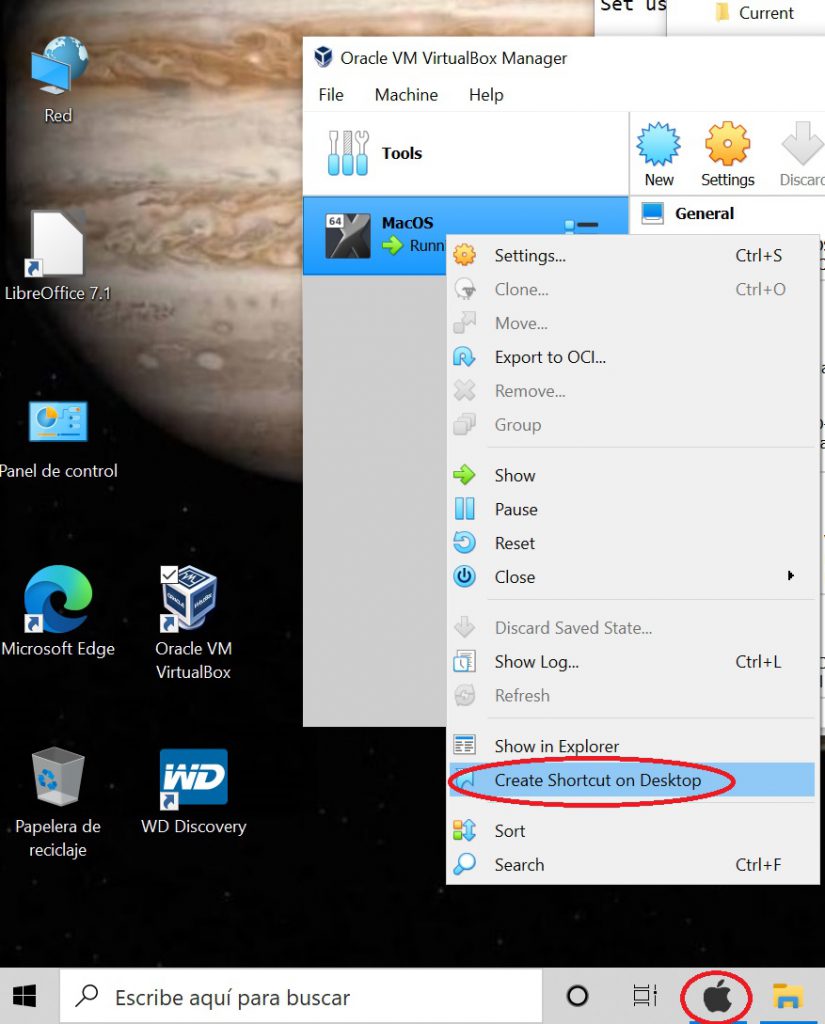
I also recomend you to make a Shortcut to the Virtual Mac machine
and move it to the Windows tools bar to open the machine and
change easily with one click between Windows and Mac
Et voilá this is how your CHUWI UBook Tablet looks now