
Remote Desktop Protocol (RDP) is not compatible with Pantheon, the Elementary OS desktop, so for now we have to ignore RDP to establish a remote control system over a system based on Elementary OS.
However, Virtual Network Computing (VNC) does work perfectly with Pantheon, so we are going to choose VNC for our remote control.
The VNC server is the program on your computer that shares your screen. The server passively allows the client to take control of it.
The VNC client is the program that monitors, controls and interacts with the server. The client controls the server.
Regarding VNC there are several solutions, some are free and others are not, such as Real VNC, in which the server part is not free and only the client is free with certain limitations, it also implies having to register and provides few advantages over other solutions.
As a VNC server we have chosen X11VNC, which is robust, simple and free.
We install it with the following commands by openning a command window:
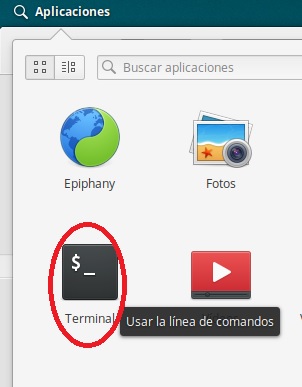
sudo apt-get update

sudo apt-get install x11vnc net-tools
Ok is already installed, now we are going to configure it
First we establish the password to access from the client.
x11vnc -storepasswd

Enter VNC password: *********
Verify password: *********
Write password to /home/user/.vnc/passwd?  [y]/n y
Password written to: /home/user/.vnc/passwd
The VNC server will start on default port 5900. In case the port 5900 is busy with some other service, it will automatically select the next available port like 5901.
If we want to establish another port we will do it with the parameter -rfbport portNumber
For example we can start the server from the command line:
sudo x11vnc -auth guess -forever -loop -noxdamage -repeat -rfbauth /home/UserName/.vnc/passwd -rfbport 5959 -shared
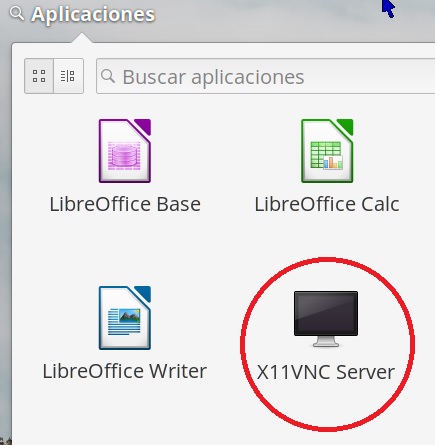
We can also start the server from the graphical x11vnc environment from the applications menu
Then this screen is displayed

we click ok and then we see this other screen
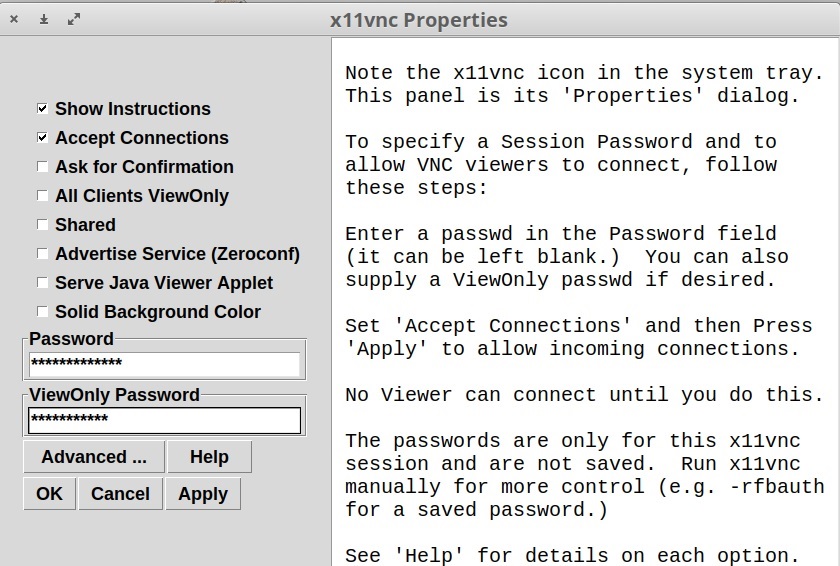
We choose Accept Connetions and write the access passwords, the top one is for desktop control and the bottom one is for viewing only.
Finally, click on Apply and Ok and the VNC server is already started and waiting for the connection.
We only need a VNC client to connect, there are clients for Android like VNC Viewer, for Linux like Remmina and for almost all operating systems.
We are going to do it with UltraVNC viewer for Windows that works well, and it is free.
You can download it from here
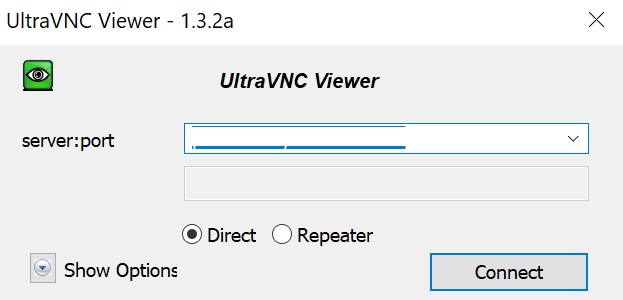
You write the name of the server or the IP address of the server and followed by: the port (5900) for example 192.168.1.95:5900
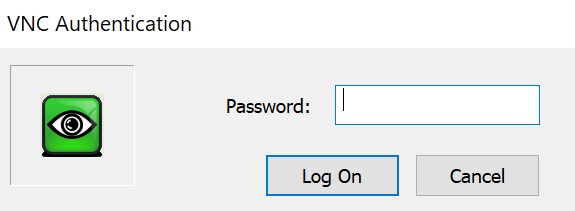
Then it asks for the password and voila we are already connected to the VNC server.
Serra Tiy new musical album En lo Mío